Learn how to enable Cross-Domain tracking and extract the most out of any funnel.
Cross domain tracking enable you to track a customer journey across multiple websites without loosing the visitor identifiers or sessions.
Why cross-domain tracking matters?
Let's say that your online store runs on yourstore.com and the checkout system is on yourstore.checkoutprovider.com.
Your checkout provider lets you add your Google Analytics tag on their system so you can track and attribute your conversions to your ad campaigns.
When the user clicks on the Checkout button to navigate to the checkout page a few things will happen:
🚫 Without Cross domain tracking:
- A new session will start and will be set as source/medium: yourstore.com/referral
- A new cookie will be set on the user browser
- The conversion will be tracked to yourstore.com/referral
✅ With cross domain tracking:
- The session will remain open preserving the source/medium that triggered the initial visit to your store
- The cookie data will pass to the checkout page URL
- Google Analytics will record the conversion and attribute it to the initial session and user
- If you're advertising on Google Ads, the conversion will be attributed to the initial session
Popular cross-domain tracking use cases:
- Cross domain between a blog and a shopify store hosted on different domains
- Cross domain between a website and a cart system (thrivecart, samcart etc..)
- Cross domain between two AnyTrack account holders
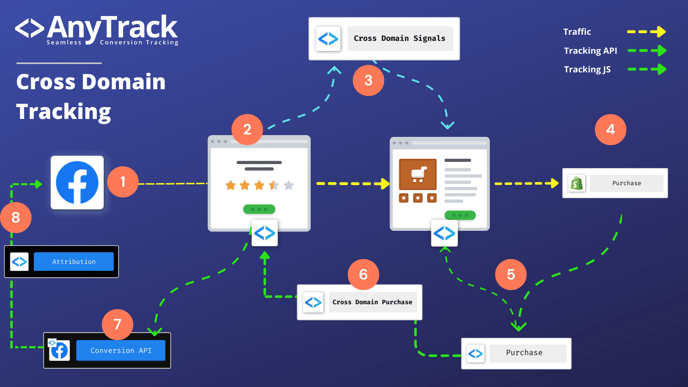
AnyTrack cross-domain tracking data flow
Prerequisites
- Each domain must be set as an independent property, with its own tracking tags, and pixel integrations.
- Cross domain settings are controlled from the property where the initial traffic is generated.
Setup guidelines
Use case: Setup a cross domain for a blog promoting a Shopify store
Definitions:
Cross Domain Property: The property that you advertise on Google, Facebook (or other) and from which you send traffic to your shop.
Cross Domain Destination: The property that receives traffic from the Cross Domain Property.
-
Open settings of the Cross Domain Property and navigate to the settings tab.
-
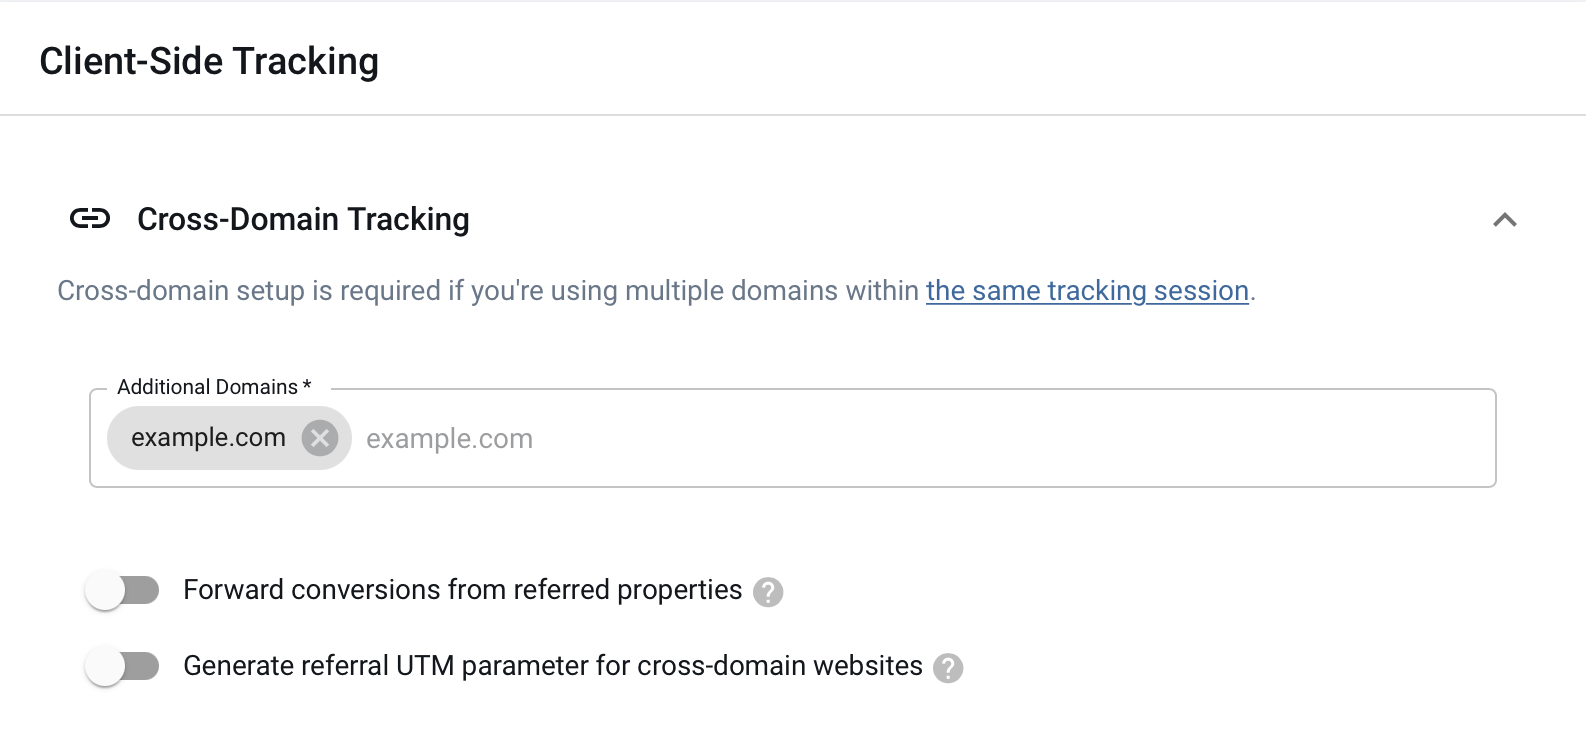
Scroll down to the client-side tracking section and open the Cross-Domain Tracking option.
-
Add the root domain(s) of the cross domain destination
-
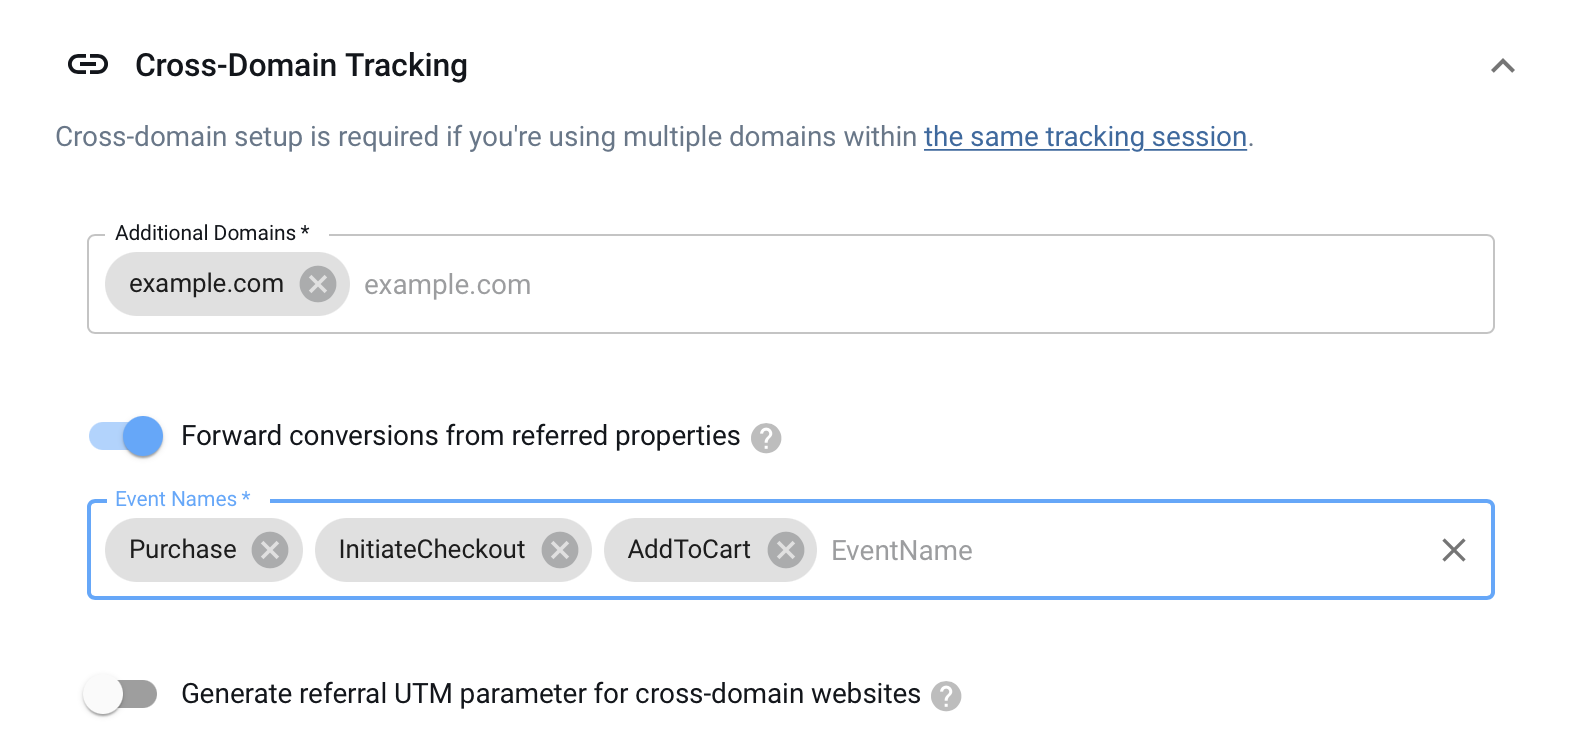
Toggle the Forward Conversions from the referred properties.
This setting will enable the conversions from the Shop to be sent to the Cross Domain Property -
Select which conversions events you'd like to receive from the Cross Domain Property.
- Enable UTM parameters if you want AnyTrack to forward UTM parameters from the Cross Domain Property to the Cross Domain Destination.
- Save your settings
Test your cross domain tracking setup
- Open the Cross Domain Property website and hover on one of the links pointing to the Cross Domain Destination website (your shop)
- You should see a parameter <code>?atrefid=auoasdiafs0df8as0d89fas0df8</code> appended to the shop url.
If you don't see it it, open a new browser window (incognito mode) or guest mode, and repeat step 1,2. - Now click on the link and go through the funnel.
- Once you are done, you can open the conversion event page of the Cross Domain Property and check the conversions that were received from your shop.
- You can also check Google Analytics realtime dashboard where you should also see the conversions
- Facebook event manager will take about 20 minutes to display your conversions.
Conclusion
Now that your cross domain settings are updated you will be able to:
- Promote your blog on any ad platforms.
- Track and attribute conversions as if your blog was the "Shop" itself.
- Build custom audiences on both properties, and according to any of the conversions or events received from your Shopify property.
- Run campaigns promoting your Shop independently.
Cross domain between AnyTrack accounts
If you partner up with another AnyTrack customer passing conversion data between properties is done through the AnyTrack / Webhook integration.
In the scenario where the Blog and the Shop are in different AnyTrack accounts, you will have to follow the same instructions, except that in order to sync conversions between the two properties you will need to follow these instructions:
Owner of the blog
- Follow the standard cross domain tracking instructions
- Ignore the Forward Conversions from referred properties.
- Then Create an integration - Select AnyTrack
- Send the Webhook URL to the Shop owner
Shop owner
- Create a webhook
- Paste the webhook URL the Blog Owner sent you
- Select the conversions you'd like to send to the blog owner
- Save

Frequently asked questions
Do I need to add the subdomain of the cross domain property?
No. Just add the root domain and Anytrack will take care of the rest.
Do I need to add the domain of the initial domain in the cross domain settings?
No. It will generate self referral traffic which will corrupt your tracking.
Can I add a domain that I don't own on the cross domain settings?
Yes, but you'll need a way to get conversions to sync with your account.
Shall I add the domain of a platform integrated in AnyTrack (example: Thrivecart)?
No. Thrivecart has its own settings that you should follow.
Can I modify the UTM parameters sent to the referred property?
No. Currently the UTM parameters are set by default.
Can I setup cross domain tracking on the same property?
Yes, but it's not recommended as it will generate self referral for the cross domain property.