Kartra
Get the most out of Kartra and AnyTrack with our custom integration. Learn how to connect Kartra with AnyTrack and start tracking conversions today.
Limited Support for Custom Integrations
We currently do not offer setup support for custom integrations not listed in the Integration Catalog. Any guidance provided in our documentation for such integrations is to be used at your own risk and may no longer be updated or maintained.
This guide is intended for customers that have a basic knowledge of Google Tag Manager and the ability to work with Make (formerly known as Integromat). If you're not familiar with either platform, do not attempt to implement yourself as our support staff is not trained to provide support for such tools.
Kartra tracking limitations:
- Hidden fields: To the best of our knowledge it is not possible to pass custom data into kartra forms which limits third party analytics platforms to implement server side tracking.
- Standard tracking parameters: UTM tracking is not available in Kartra and therefore, it makes it close to impossible to track ad campaigns in an efficient manner.
Integration overview:
- When a form is submitted an event is sent to AnyTrack with Google Tag Manager.
- An identify call is sent to AnyTrack to tie the Kartra lead to the anytrack first party data.
- Any events triggered within the Kartra platform can then be sent via webhooks to AnyTrack.
- Event Data sent by Kartra via Webhooks is automatically mapped to AnyTrack Standard. parameters via Integromat (Make).
- Mapping Kartra standard events to Facebook Conversion API standard events.
Requirements:
- Google Tag Manager
- Make (formerly known as Integromat)
- An AnyTrack Property
- An AnyTrack Custom Integration - Create one here.
AnyTrack custom integration:
- Create a custom integration
- Add dummy values (placeholders)
- Save and Copy and Paste the URL into a text file
- Delete all query string parameters (including the
?) - The result should look like this:
https://t1.anytrack.io/asdfasf/collect/custom-kartrax
Keep this URL handy in order to add it to your Integromat scenario in Step 2.
Step by step guide
This guide assumes that you've already created a property in your AnyTrack account and that you've created a custom integration in AnyTrack.
Step 1: Google Tag Manager
- Download and Unzip the GTM Kartra prebuilt Container - Download here..
- Import the container template into your GTM Container.
- Update the Constant variable Anytrack Property ID.
- Publish the container.
- Copy the Google Tag Manager Tag and delete the
<script></script>wrapper.
GTM Standard TAG Updated TAG
(function(w, d, s, l, i) {
    w[l] = w[l] || [];
    w[l].push({
        'gtm.start': new Date().getTime(),
        event: 'gtm.js'
    });
    var f = d.getElementsByTagName(s)[0],
        j = d.createElement(s),
        dl = l != 'dataLayer' ? '&l=' + l : '';
    j.async = true;
    j.src = 'https://www.googletagmanager.com/gtm.js?id=' + i + dl;
    f.parentNode.insertBefore(j, f) f;
})(window, document, 'script', 'dataLayer', 'GTM-MQ6ST5W');
- Now paste the GTM Tag across all pages you'd like to track
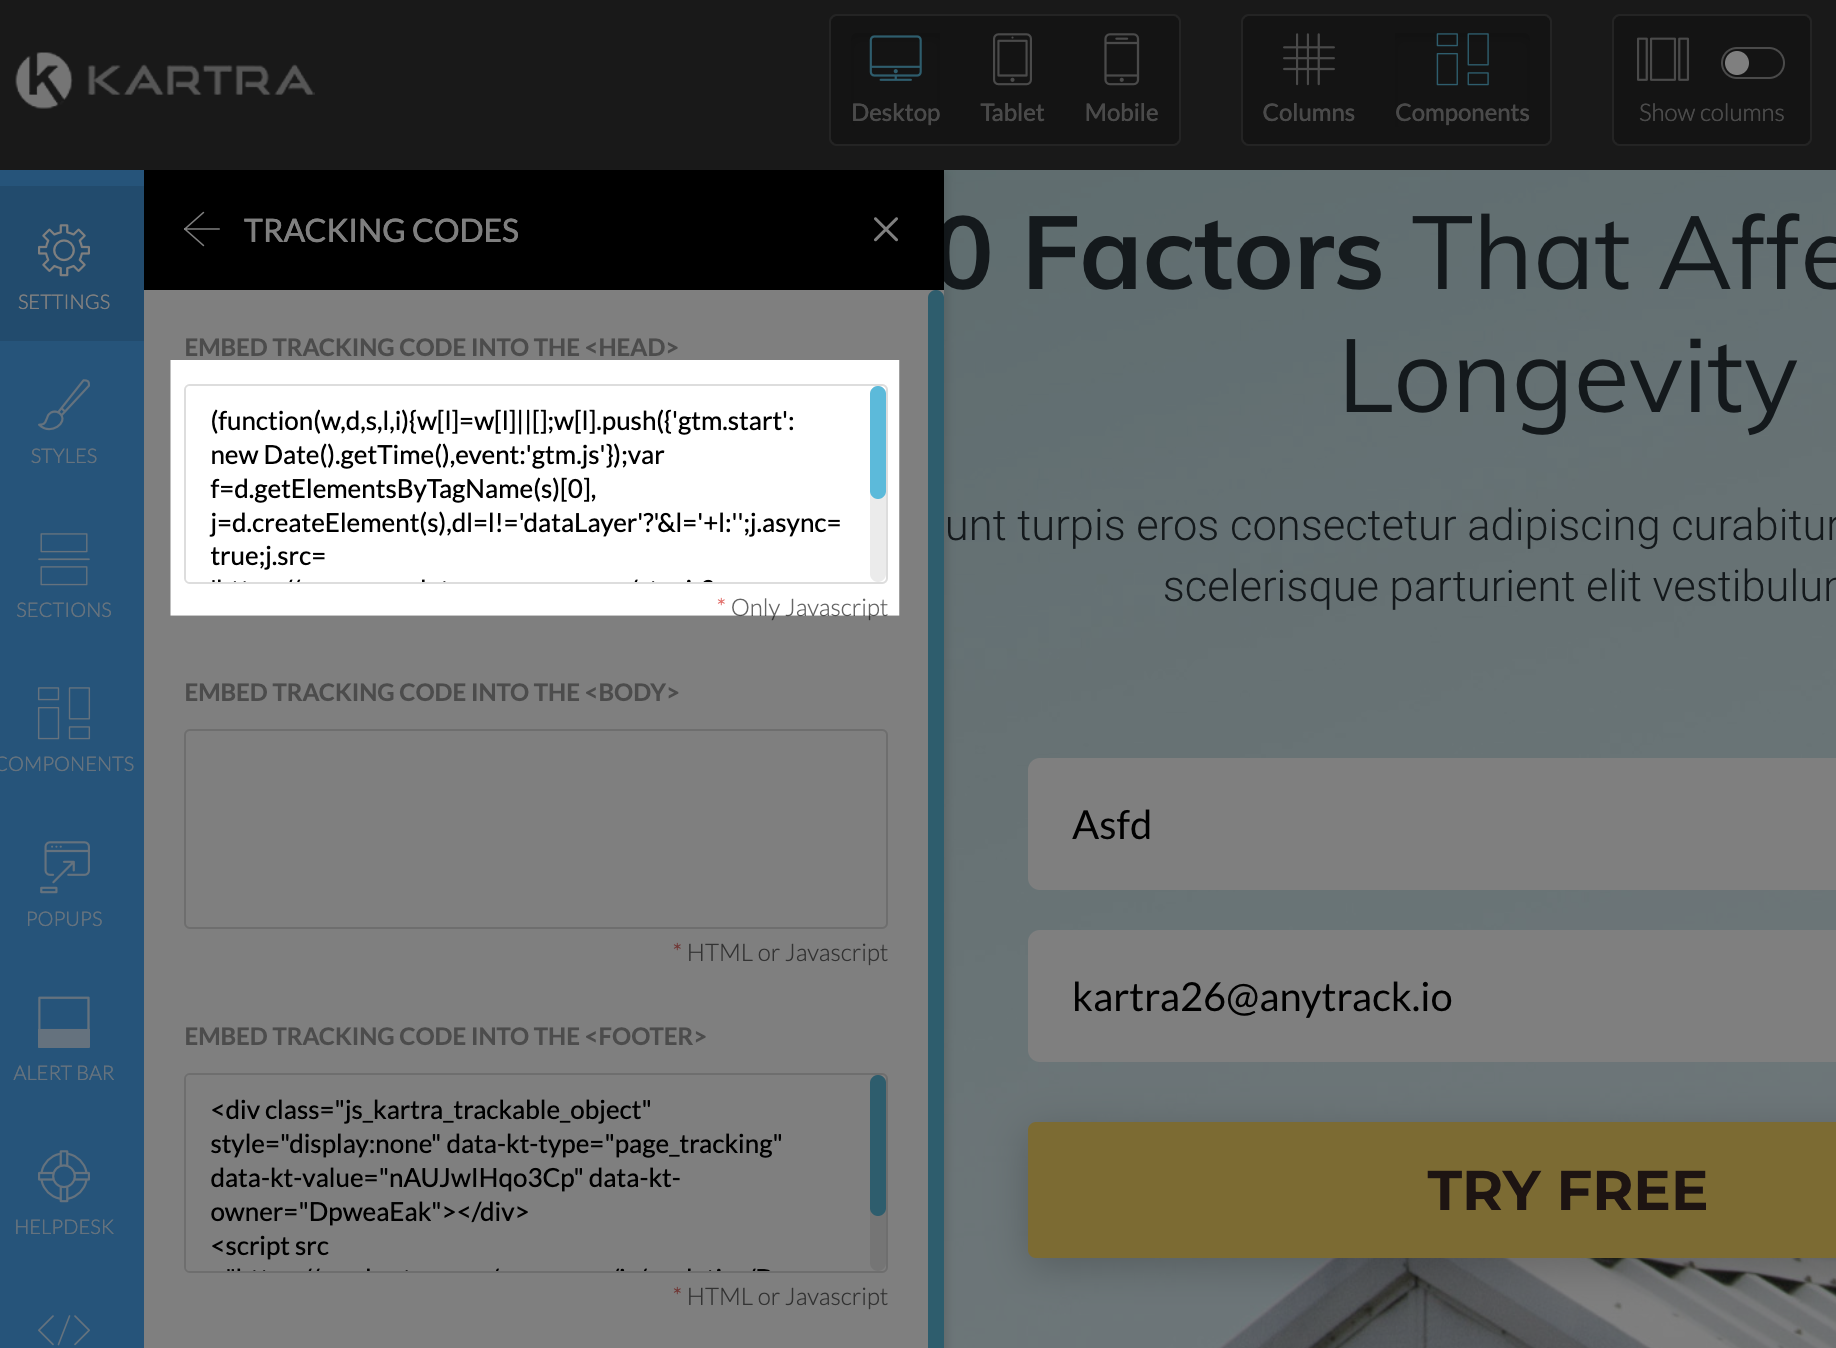
- Save and publish your pages.
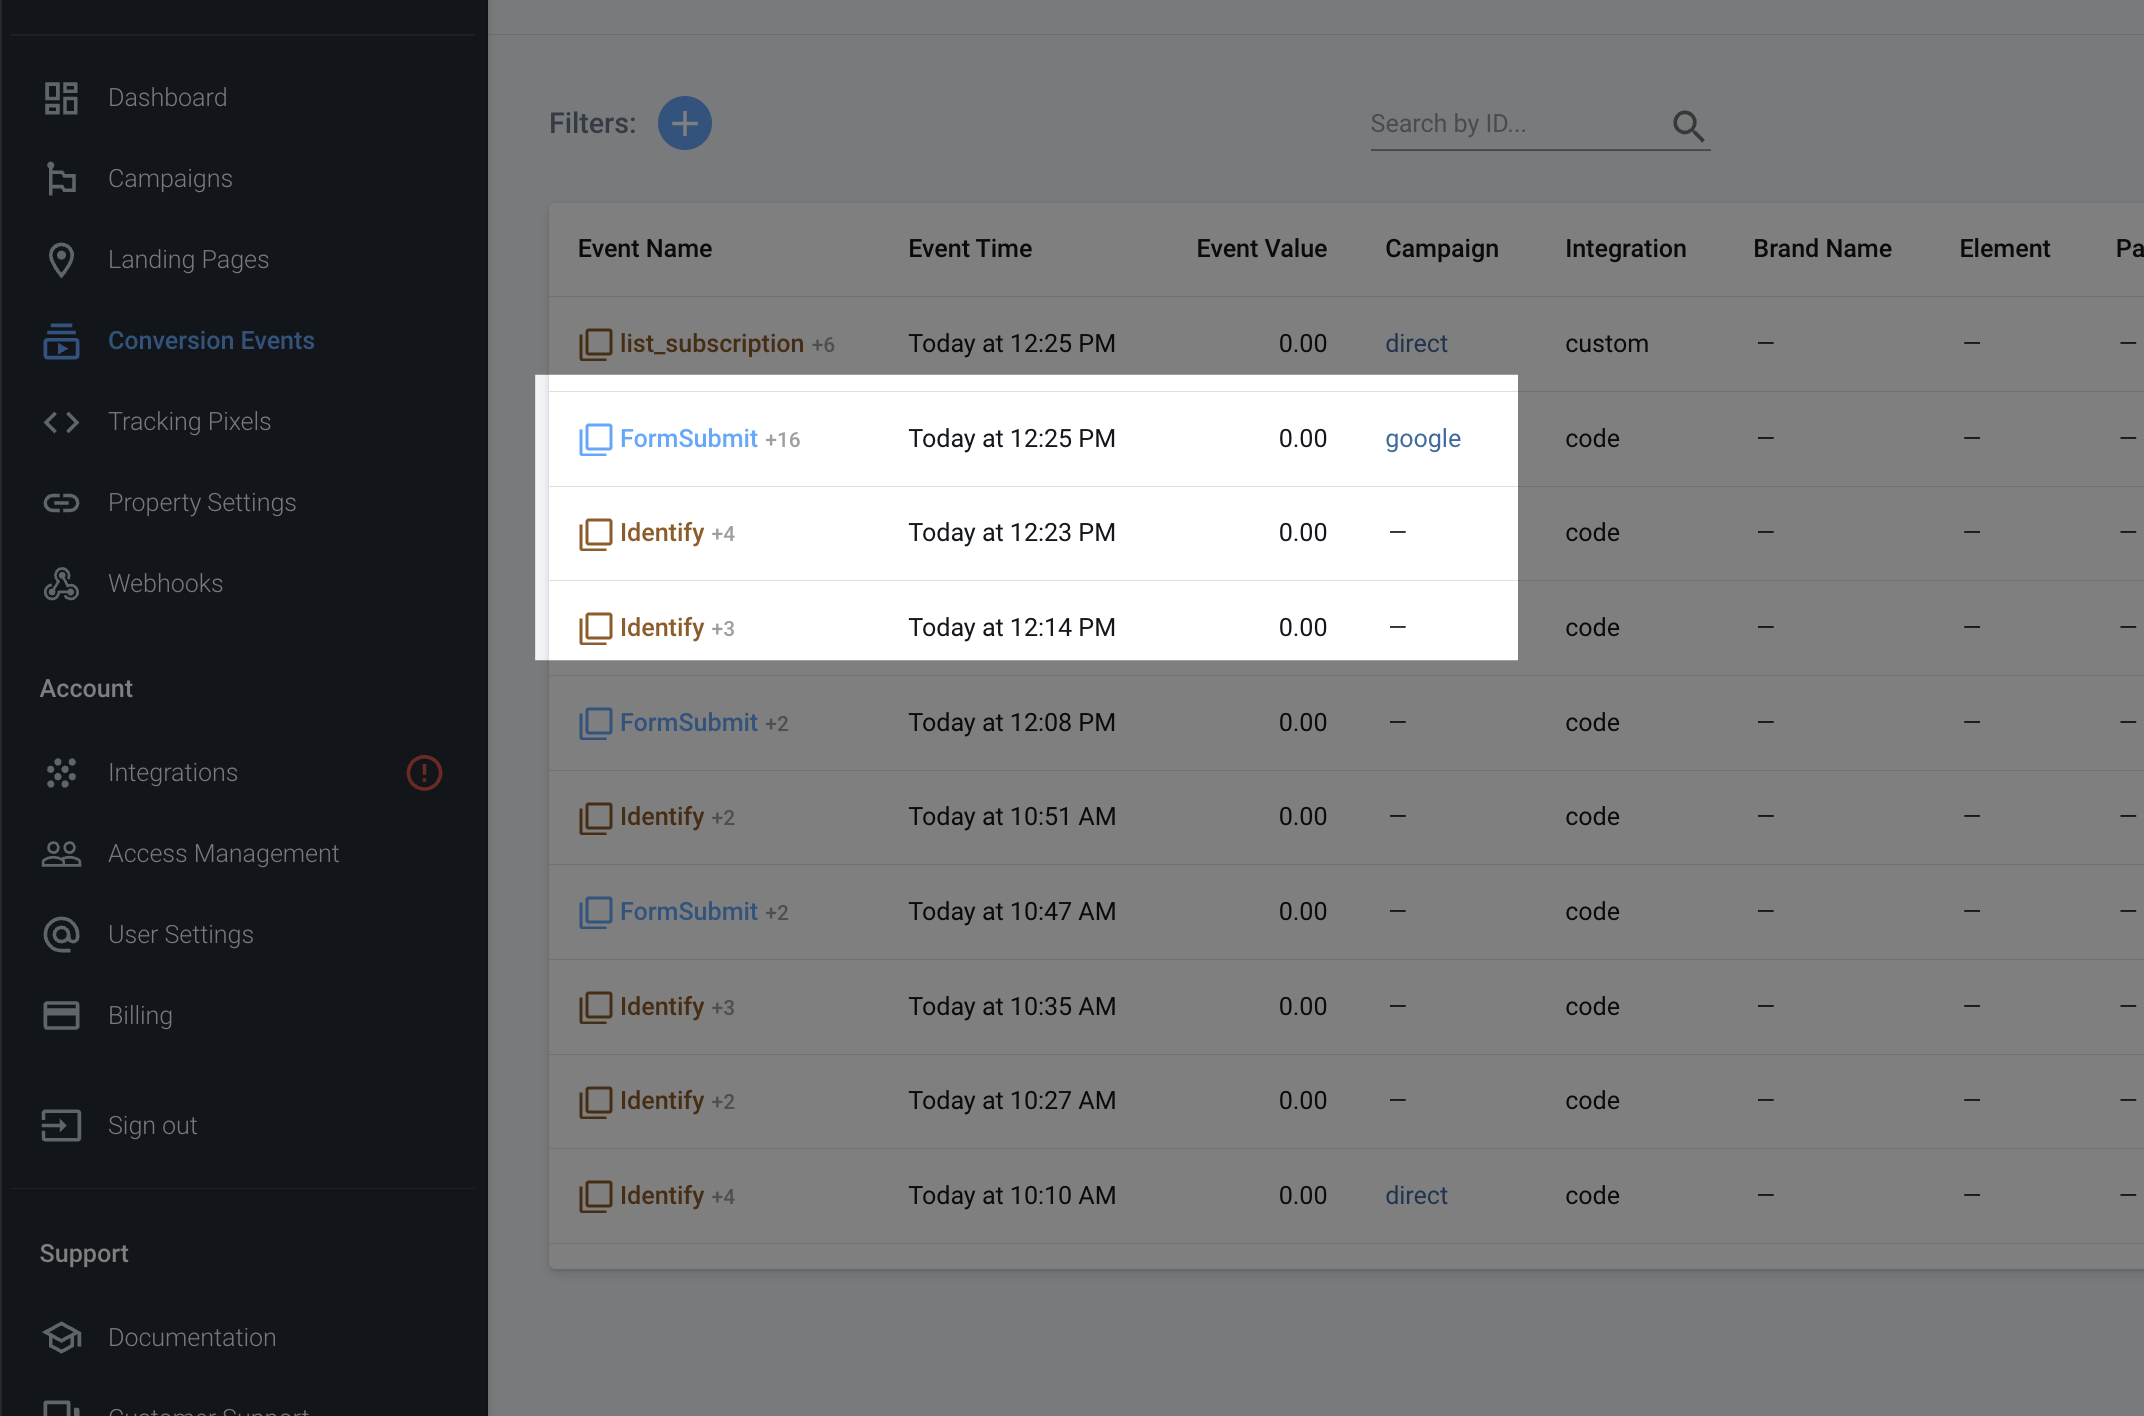
You can test your pages and see the form submission events in the Conversion Events tab
Step 2: Make (integromat)
To simplify the setup, you can import the predefined blueprint into your Make account and update the required parameters to match your integration settings.
The blueprint is available for download here.
- Create a new scenario.
- Import the blueprint.
- Update your settings (authenticate with Kartra).
- Copy the Integromat Webhook URL.
- Open the HTTP module and paste your AnyTrack webhook URL.
- Save and turn on the scenario.
Step 3: Kartra API Integration
- Navigate to Kartra Dashboard.
- Open the integration tab.
- Create an Outbound API and paste the Integromat Webhook URL.
- Select the events you'd like to track - we recommend all possible events, for all possible products so you don't have to repeat this process for every funnel or product you add to your Kartra account.
- Save your settings.
Step 4: Validating the integration
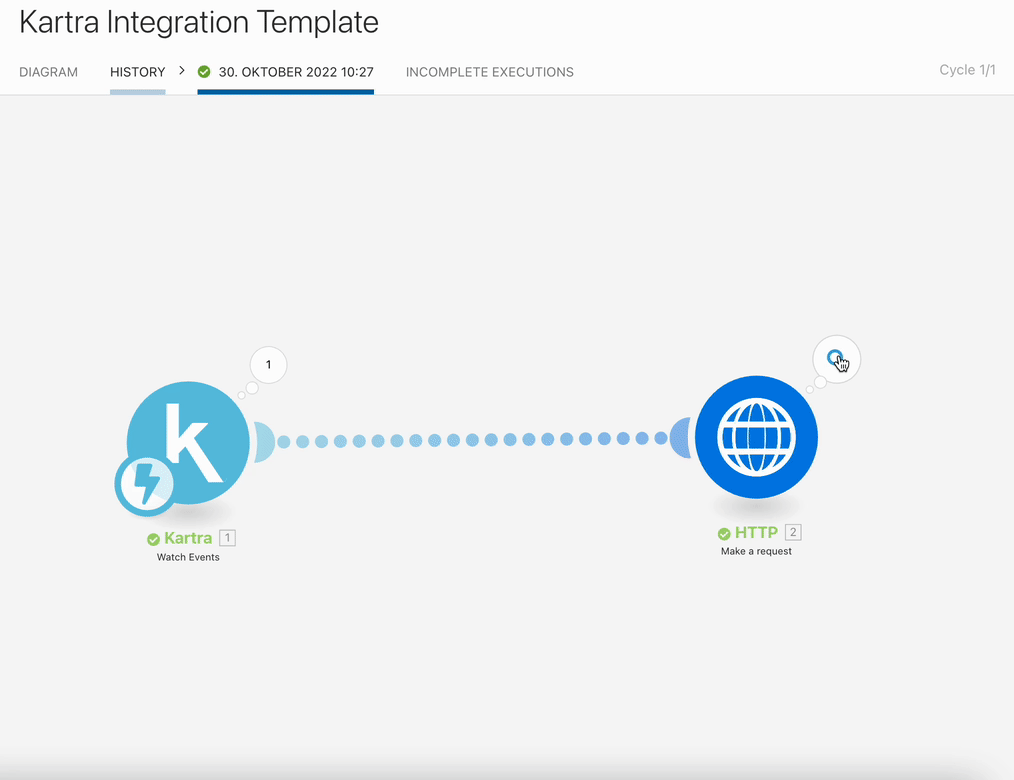
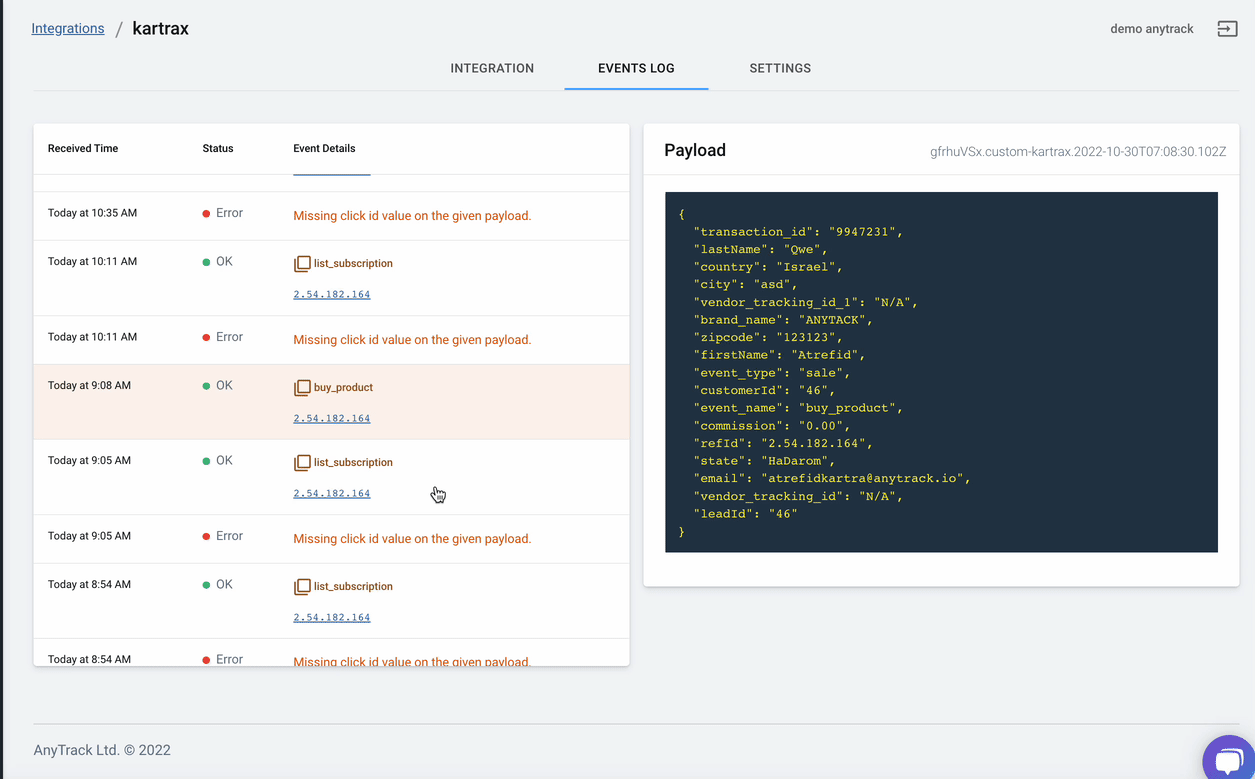
Return to integromat and click the Run once button and go through your funnel (including a purchase).
Beware!
It's totally normal to see some errors as not all events sent by Kartra carry the parameters required to track the conversions.
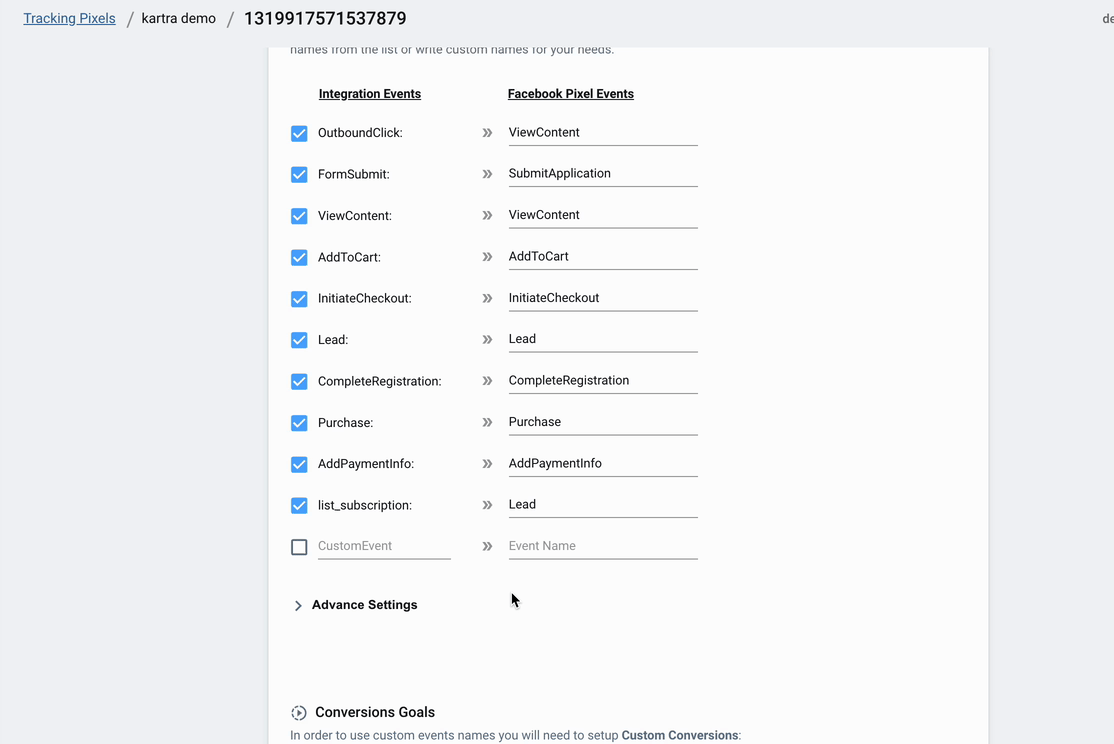
Step 5: Mapping Kartra Events to Facebook Standard Events
Since Kartra has several events that can be interpreted as Purchase we didn't want to map all of them to AnyTrack Standard Purchase Event. Having each Kartra Event will let you map these events as you see fit with your Ad platforms integrations.
- Navigate to the Facebook Pixel Integration and scroll down to the event mapping section
- Click on the Left fields and select the Kartra Events you'd like to map
- Then click on the Right field to select the corresponding Facebook Standard Event
- Save the mapping and retest the flow.
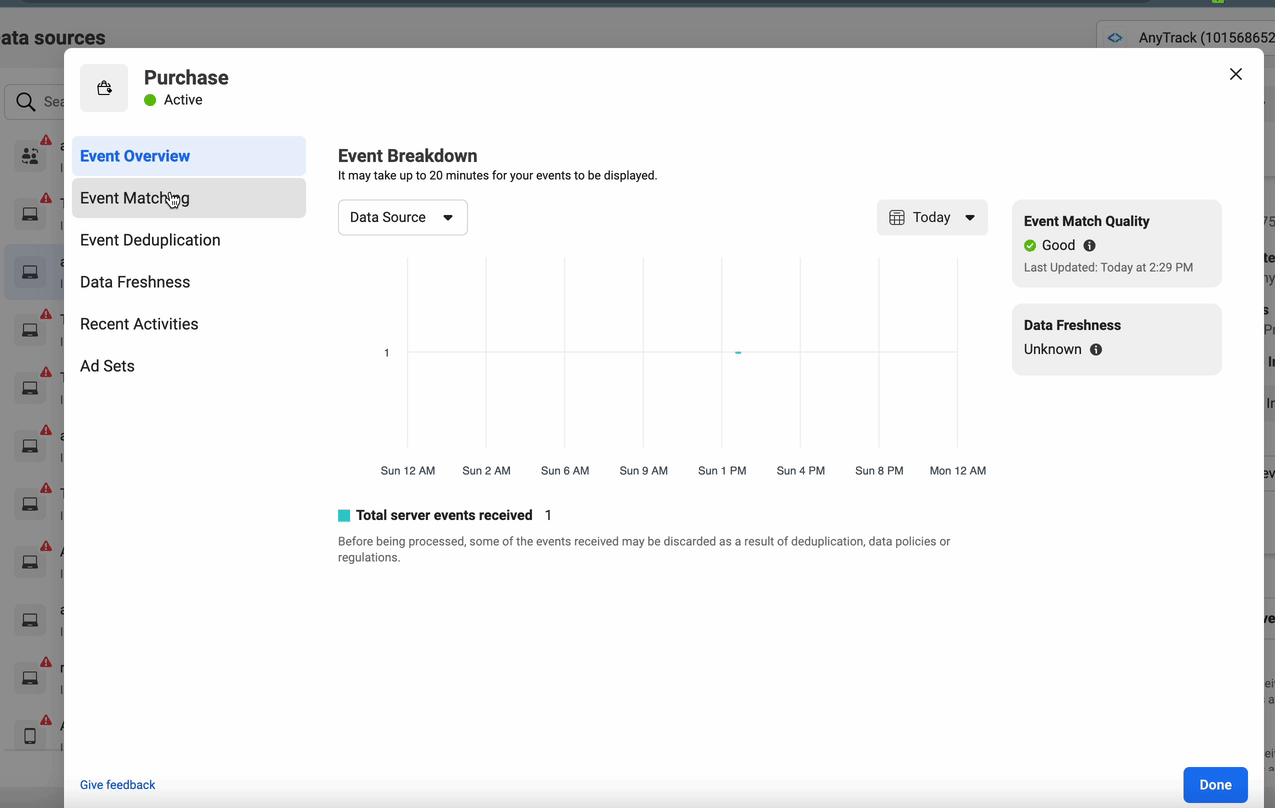
Step 6: Validate the data in Facebook Event Manager
- Wait a few minutes (Between 10- 20 min) and open the facebook event manager.
- Select the events you'd like to check and inspect the data
- You should see some parameters starting with the
at\_suffix which indicates that these are events sent by AnyTrack.
Updated 8 days ago