When you need AnyTrack to do something very specific that can only be performed by a custom script.
AnyTrack enables you to trigger custom events that match your specific campaign needs using the tracking script.
In this tutorial, we will show you how you can add a custom script on your website to track whenever a specific element is visible on the user viewport.
Note:
This tutorial requires some understanding of HTML and basic knowledge of how website elements structure a page. If you're not familiar with html or javascript, you should hire a developer to perform these tasks.
Step 1: Finding your element on the page
In order to track a specific element on the page, you will need to tell the browser how to find this document within the HTML code.
In order to view the element HTML code, scroll down to the element you want to track and right-click on the element:
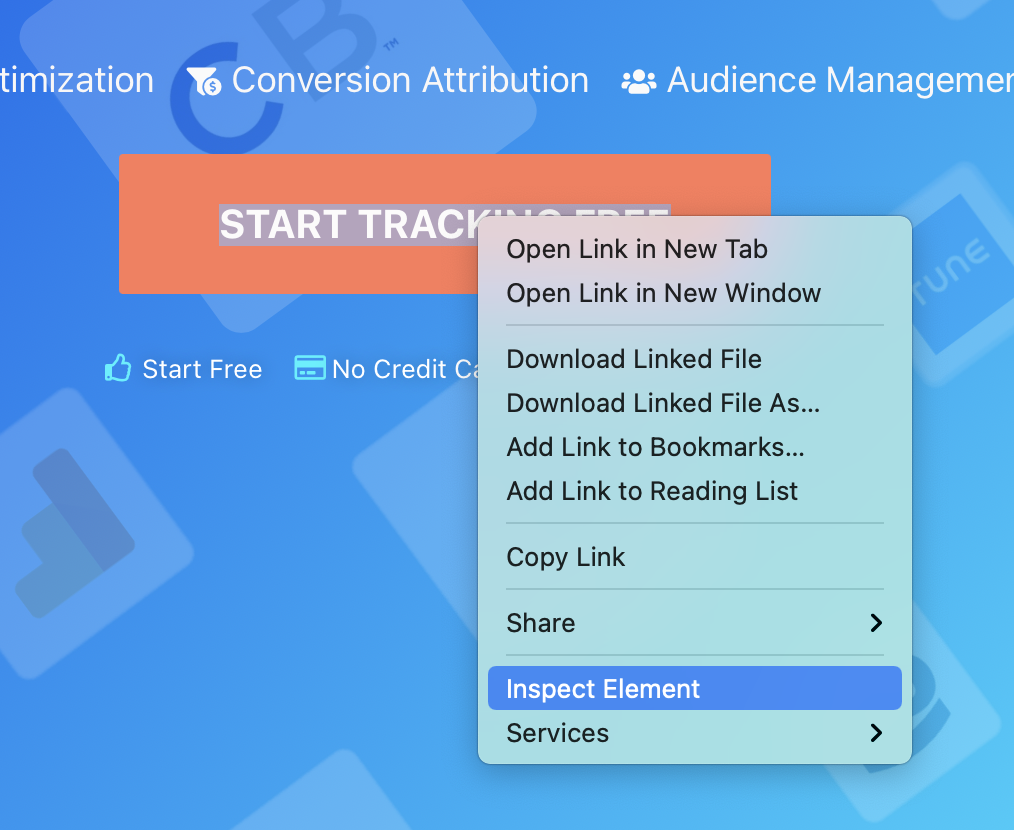
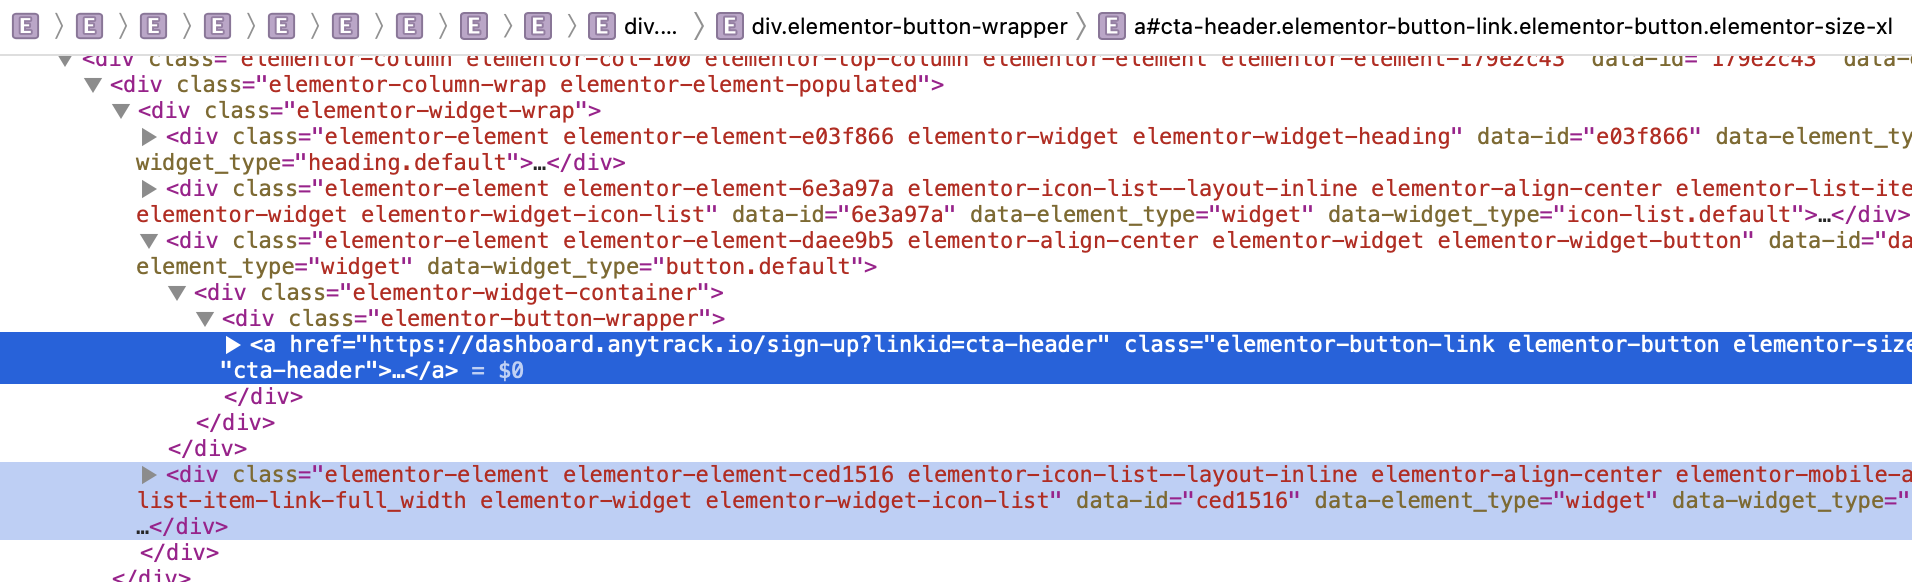
On the menu, click on “Inspect Element”, and you will see how the element is represented within the HTML code:
Step 2: Determinate your element selector
Option 1: Using an element id attribute
The easiest way to find an element in a website is using the id attribute. Simply find your element in the HTML and check if the element has an id attribute.
For example:
<button id="my-button">Click Me</button>
In this example, the button has an id attribute with a value of my-button.
If your element doesn't have an id attribute, we recommend that you edit the element code (not in the browser, in your CMS) and add an id to the element.
Option 2: Use an element unique class names
If your element doesn’t have an id attribute or if you wish to track the element with CSS class names, it’s possible to track it using one or more class names you have on the element.
On the element HTML code, find the element class names using the class attribute.
For example:
<button class="cta-button primary">Click Me</button>
This element has 2 class names: cta-button and primary.
Step 3: Add a Custom Event Trigger
After you figure out what the event selector should be, you’re ready now to add a JavaScript code on your page that will trigger a custom event when your users view this element for the first time.
Copy and paste the following code on each page you want to track a scroll to the element in the viewport:
AnyTrack("onViewport", "#my-button", function() {
AnyTrack("trigger", "ViewButton");
});
Please note this code contains two parts:
- A viewport tracking code with a selector #my-button
- A custom event trigger for the event ViewButton
We will review those parts now in detail.
Placing your Element Selector
On this code, you will need to replace the #my-button string with your own element selector from the previous step. Please note that the selector string is case-sensitive.
If your selector is based on the element id, you should use the # character and right afterward, write your element id. For example, for the element:
<button id=”footer-button”>My Button</button>
The selector string should be #footer-button.
If your selector is based on the element CSS class names, you should put a dot. before each class name and join all the class names together without spaces.
For example:
For an element with class attribute class="class-1 SecondClass", your selector should be .class-1.SecondClass.
Trigger a Custom Event
Once the tracked element enters the browser viewport, the script will trigger a custom ViewButton event using the following code:
AnyTrack("trigger", "ViewButton");
You can change and replace this code to meet your specific needs.
Please see this guide on how to trigger events using JavaScript.