Learn how to integrate your Google Ads account with AnyTrack so you can track your campaigns and send conversion data to your Google Ads account
The Google Ads Integration enables you to track, attribute, report and send conversions to Google Ads API. The integration leverages both the Gtag and Google Ads API to tie user web events and offline events with the Google Ads platform so you can report and attribute the entire customer journey within Google Ads, AnyTrack and Google Analytics.
Reminders:
- Tracking methods: AnyTrack sends conversion data to Google Ads via Client Side and Server Side Gtag API.
- Tag Management: AnyTrack automatically loads your Gtag Event snippet according to the tracked events. You do not need to place the Gtag event snippet on your website.
- PII, Privacy and Hashing: Anytrack automatically normalizes and formats your conversion data to comply with privacy-related requirements, as well as Google Ads tracking best practices.
- Google Click Identifiers: AnyTarck supports all Google Ads click identifiers such as GCLID as well as iOS parameters such as GBRAID and WBRAID.
- Enhanced Conversions: Automatic support for enhanced conversions when your conversion sources (shopify, clickfunnels etc...) send them to AnyTrack.
- UTM Tracking template: A pre-built tracking url template is provided in your account.
- Campaign reporting: You will be able to analyze your campaigns in AnyTrack as well as in your Google Ads account.
- Reporting Delays: AnyTrack reports and data syncs are Real Time, but you will experience attribution delays in Google Ads (more on this below).
How to set up Google Ads Conversions
This step is required if you don't have any conversion goals in Google Ads.
- In Google Ads open the Tools and settings > Conversions menu
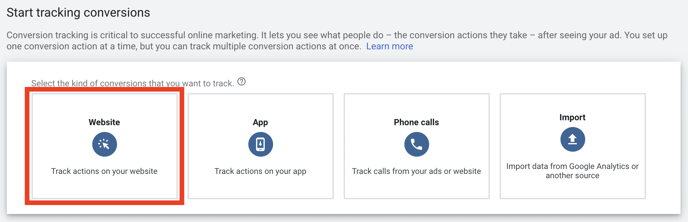
- Click on the "NEW CONVERSION ACTION" and select Website
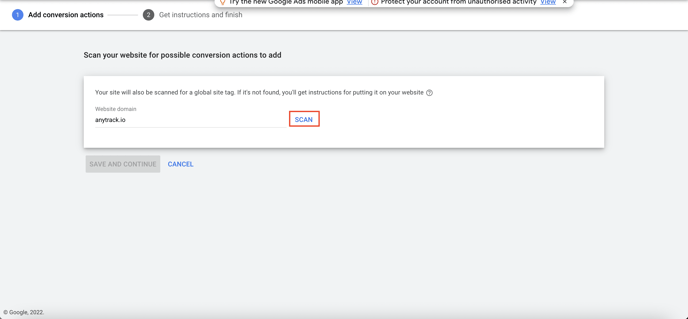
- Set your domain and click SCAN to verify GTag is on the website.
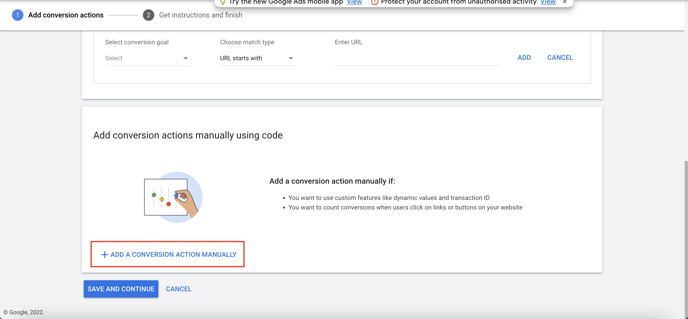
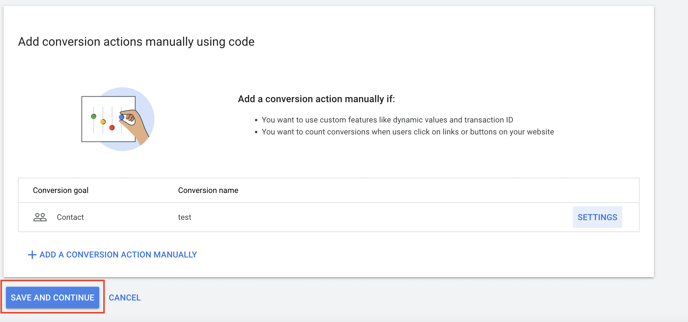
- Once the verification is completed, click on ADD A CONVERSION ACTION MANUALLY.
- Select the goal category, name, and value
In the value section, you can set the value of this conversion. If you use an online store with dynamic prices, choose to use different values for each conversion.
✅ AnyTrack will push the conversion with the value and currency automatically.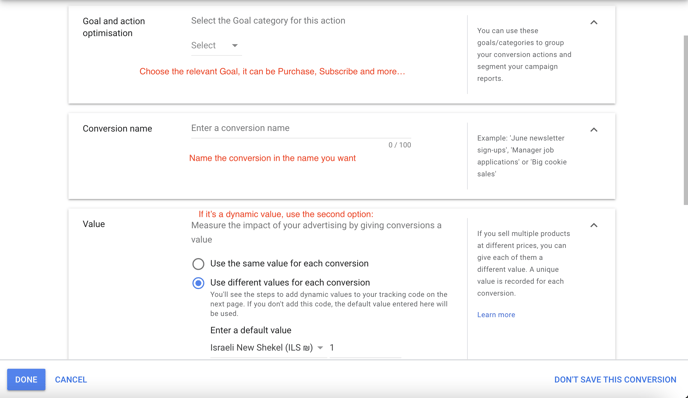
- The count setting is very important as you don't want to inflate your conversions artificially by sending multiple times the AddToCart event or an outbound click event. But for a Purchase event, it is recommended to select Every so Google can calculate the real ROI of your campaign.
- Update the attribution windows or leave the default settings.
Note: The data driven attribution model is selected by default and will enable Google to attribute the conversions and/or fraction of conversions according to the different events and campaigns.
- Click on DONE, and Create an other conversion if you need to, or SAVE AND CONTINUE
- Finally, you can click on DONE
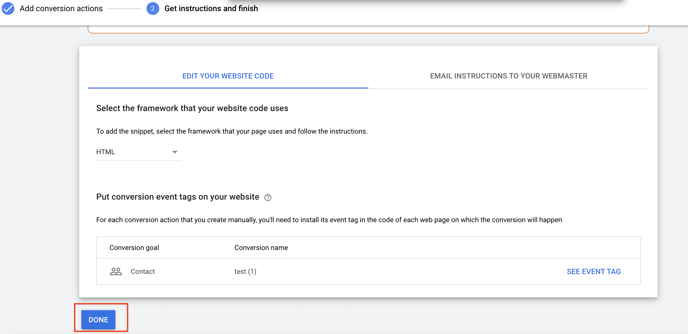
You DO NOT need to add the event tag as AnyTrack will trigger it automatically via the our tracking tag or via Server Side, depending on how the event is triggered.
Conversion Mapping
Now that you've created your conversion goals in Google Ads, you can map them with the conversion goals tracked by AnyTrack.
- Go to the Tracking Pixels section and click on Google Ads
- If you didn't connect with Google Ads, you'll be prompted to connect with your Google Ads account.
- Now you can map the AnyTrack standard events (on the left) with the Google Ads conversions on the right.
- Once you've completed this step you can save your settings
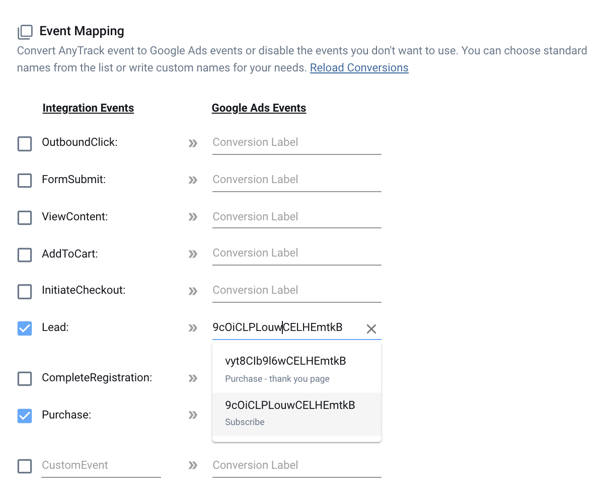
When we receive an AnyTrack standard event from your conversion sources we process send the corresponding mapped event - with all the rich data - to your Google Ads account.
UTM Tracking Template:
-
Navigate to your Account Settings in Google Ads
ℹ️ To access your account settings, you need to be on the "All Campaigns" view -
Enable Auto-Tag if it's not enabled yet
-
Paste the tracking template
The recommended tracking template can be found under your Ads Integration tab in the pixel settings of your AnyTrack account.
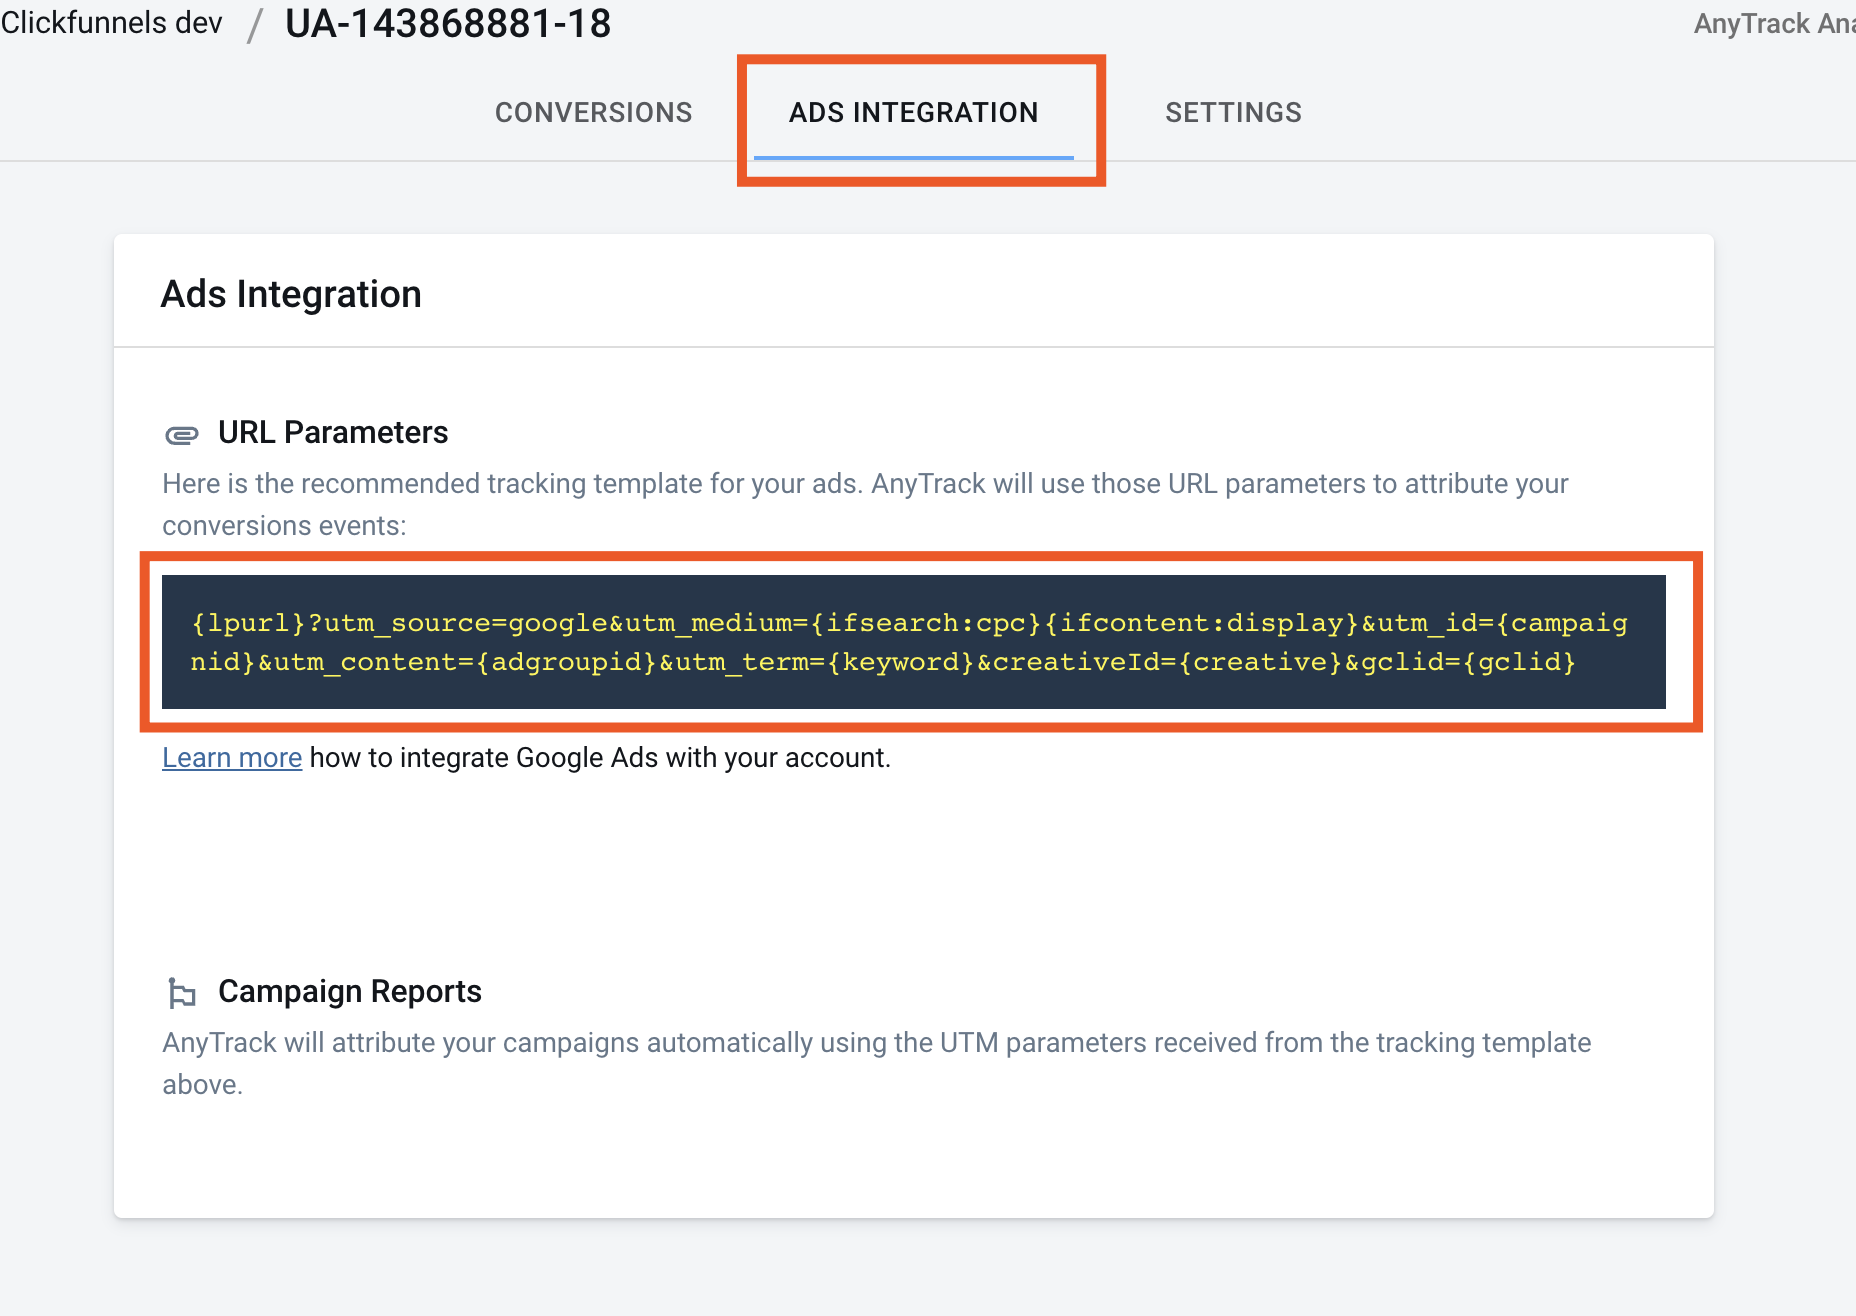
The tracking template is where you add URL tracking parameters to your ads. The You can use URL parameters to customize your final URL. The information is used to create your landing page URL when an ad is clicked.
For example:
- your final ad URL is https://anytrack.io
- You are targeting the keyword "Conversion Tracking Platform"
- Your add the URL tracking parameters: {lpurl}?url={lpurl}&utm_term={keyword}
At Run time, the URL will become:
https://anytrack.io?url=https%3A%2F%2Fanytrack.io&utm_term=Conversion%20Tracking%20Platform
Congratulations! 🎉
Now the conversions that will be generated in AnyTrack will be pushed forward to Google ads, and the optimization and performance of the campaign will improve!
🚨 Important: Turn on the Server-to-Server Conversions to improve attribution and bypass any ad blockers or browsers privacy in order to leverage the Google Ads Conversion API data sent from server-side integrations.

Google Ads FAQ and troubleshooting