Learn how to add AnyTrack to your website via Google Tag Manager
Google Tag Manager is a tag management system that lets you deploy and manage tracking tags on your website from an easy-to-use web-based user interface.
Prerequisites:
-
You need a Google Tag Manager Account
-
You need an AnyTrack account
How AnyTrack compares to Google Tag Manager
If you're currently using Google Tag Manager, you know that you need to configure various triggers that will fire your tags according to the events you want to track.
Depending on the complexity of your setup, these triggers can be hard to configure.
With AnyTrack, Event Tracking functions such as outbound clicks and form submissions are automatically triggered and the variables associated with these events are automatically captured and sent to the AnyTrack servers.
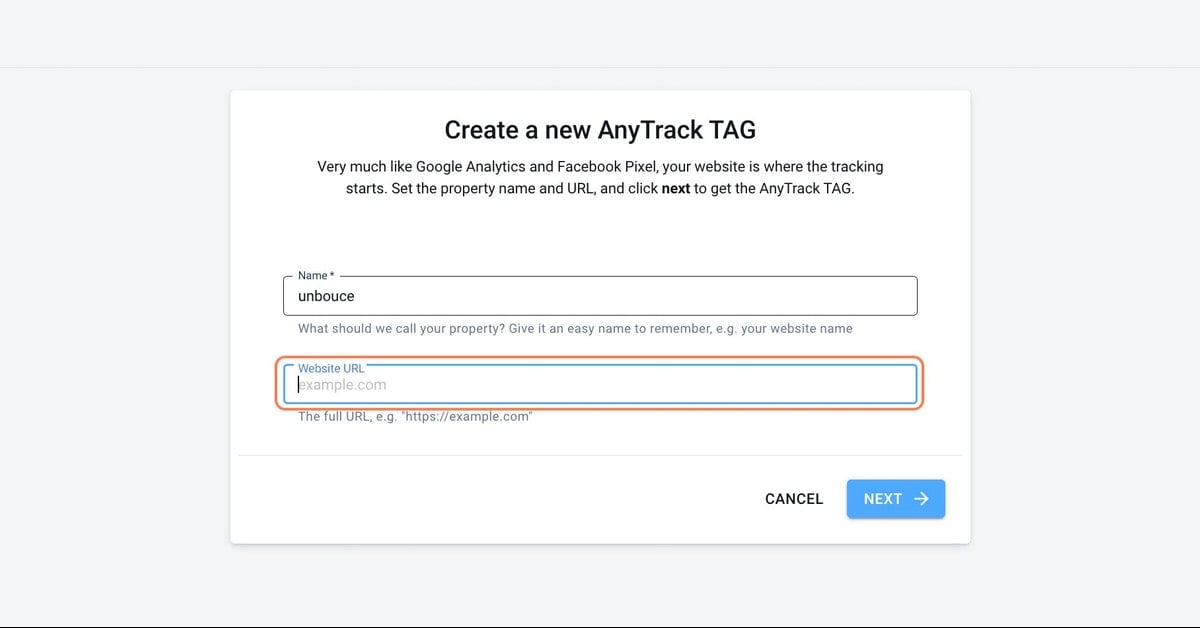
1. Create a new property
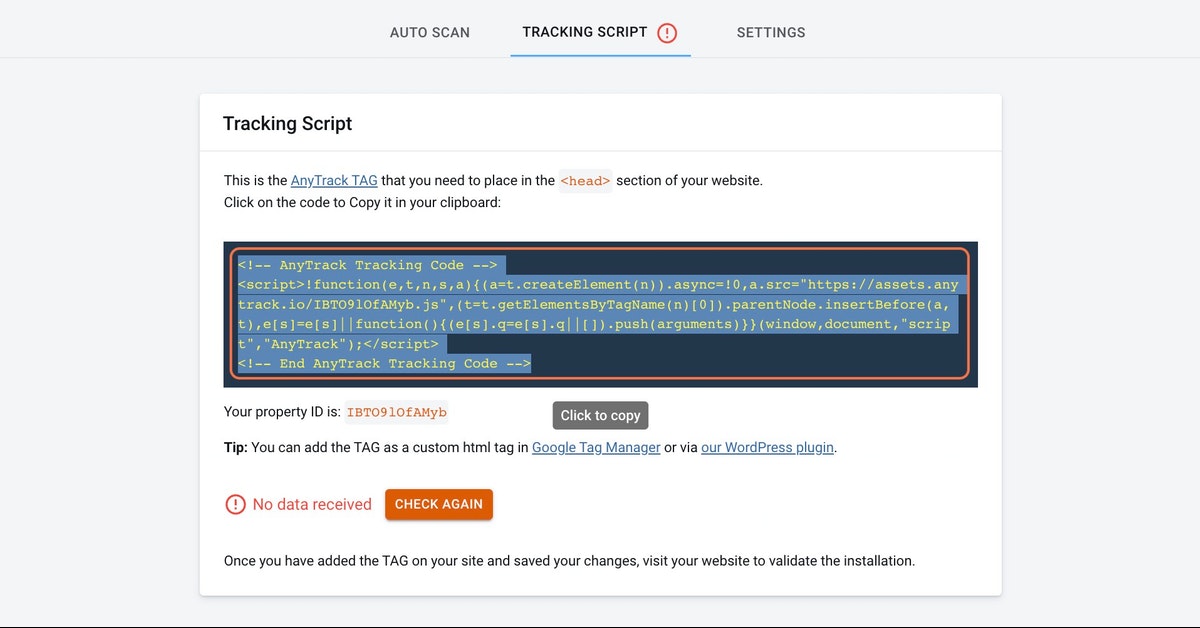
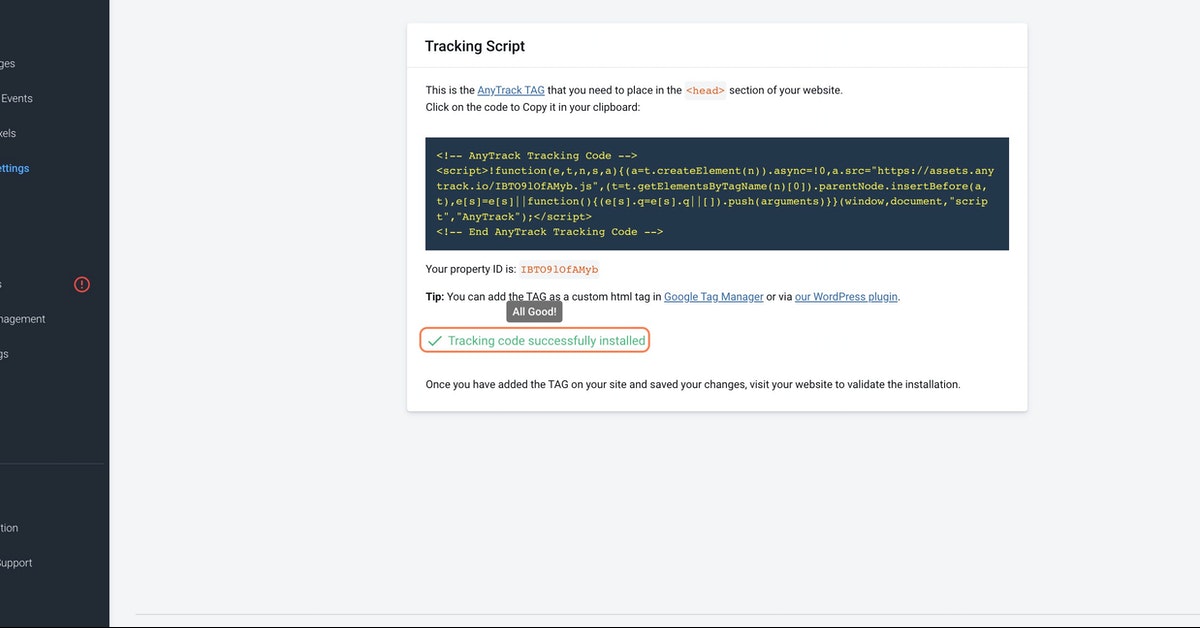
2. Click on the code to copy it into your Clipboard
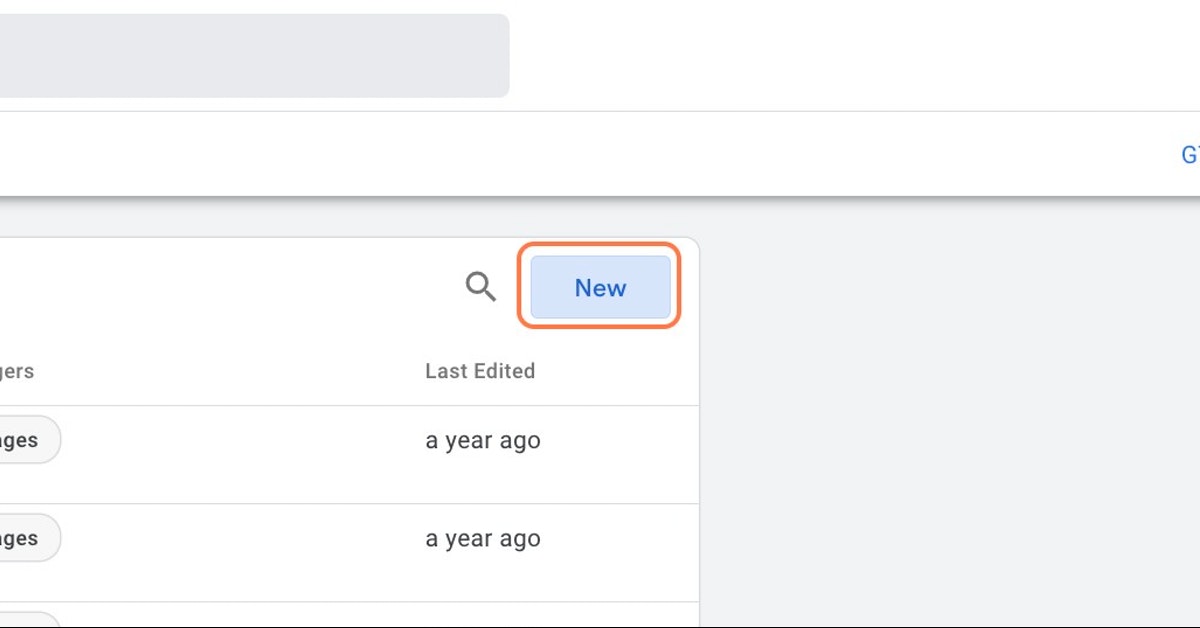
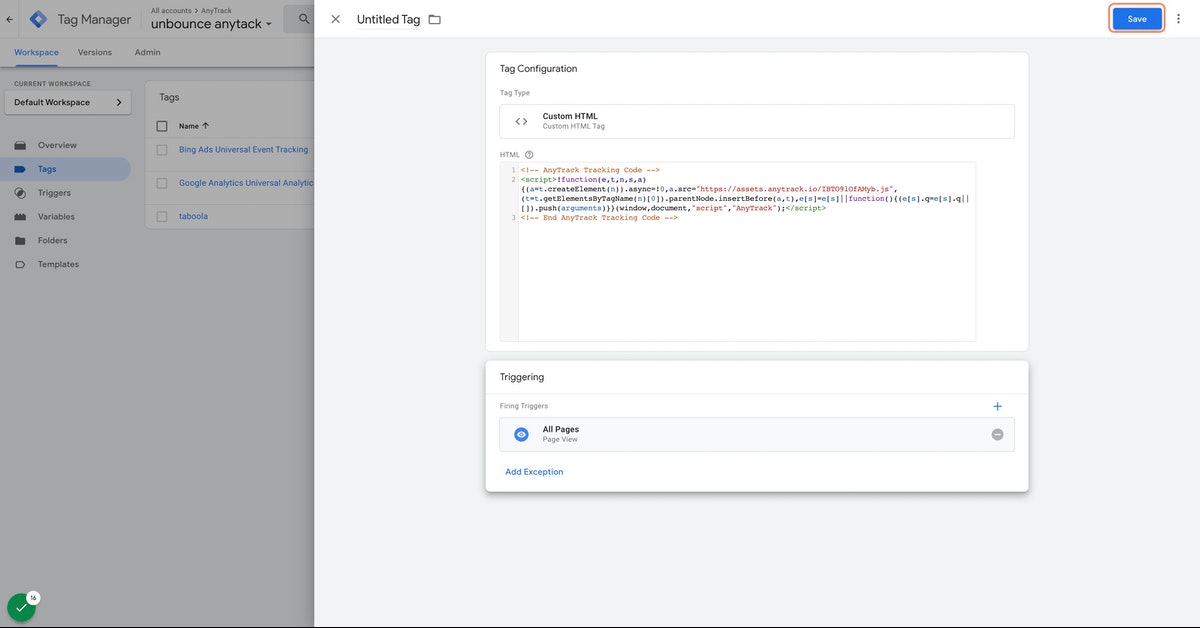
3. Open your Google Tag Manager Container
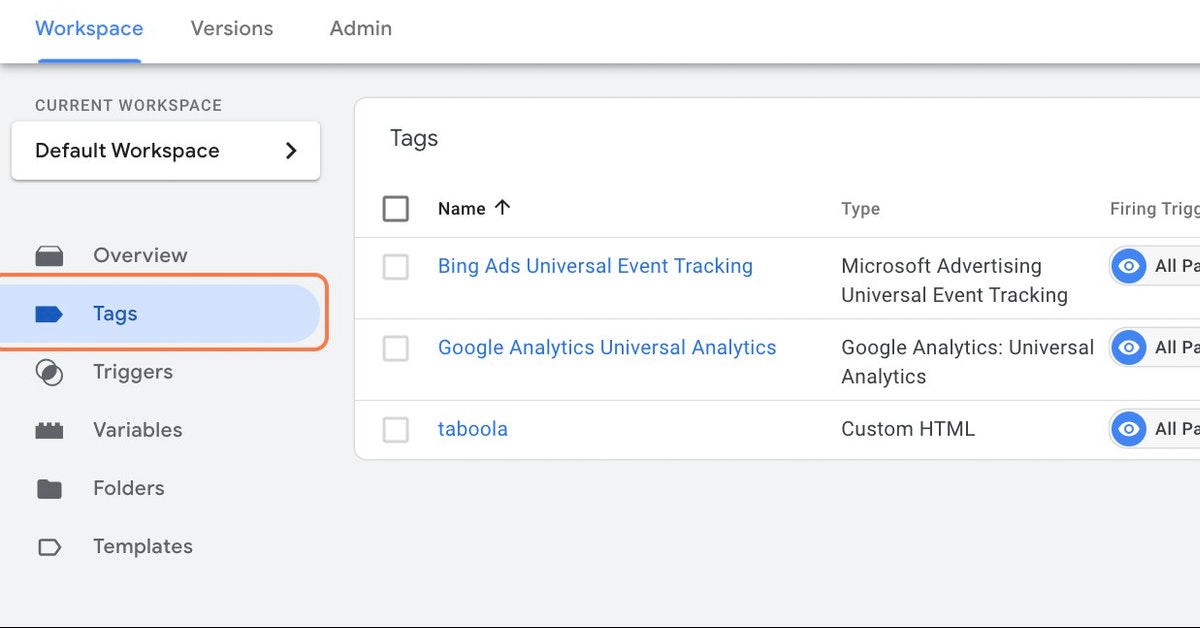
4. Add a New Tag
5. Click on Tag Configurations
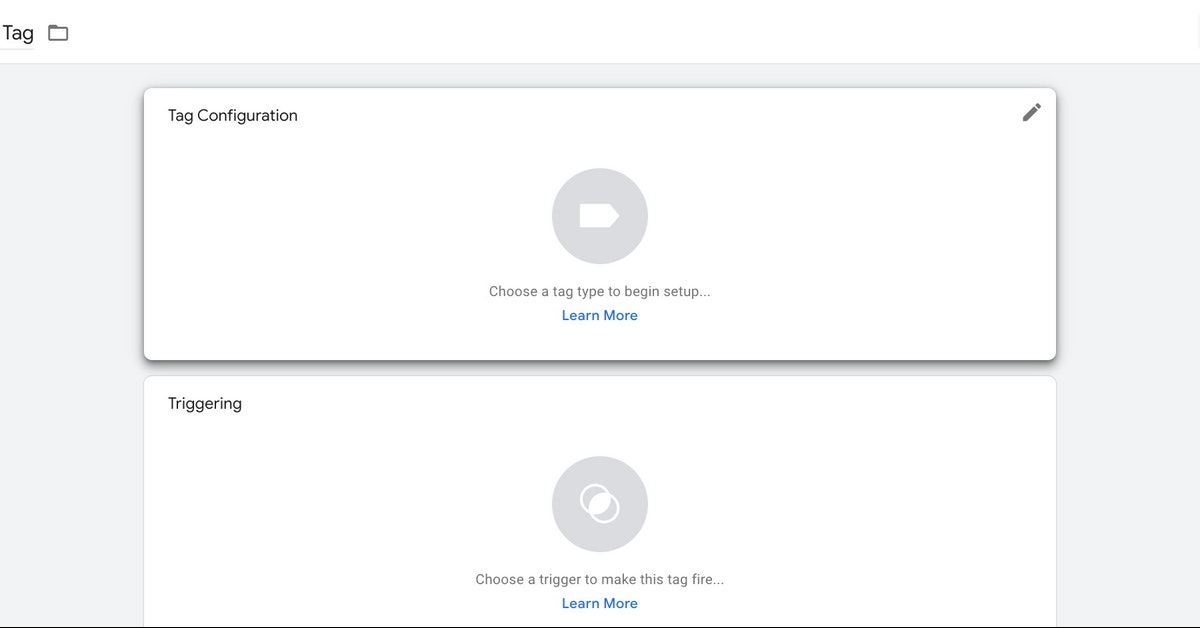
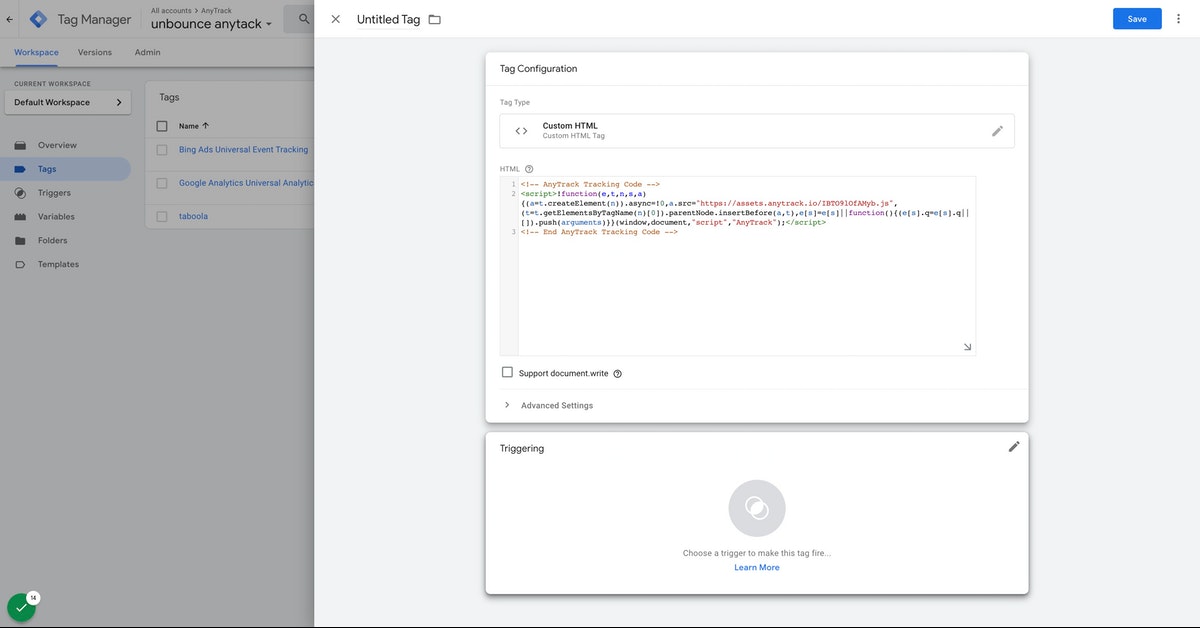
6. Select Custom HTML
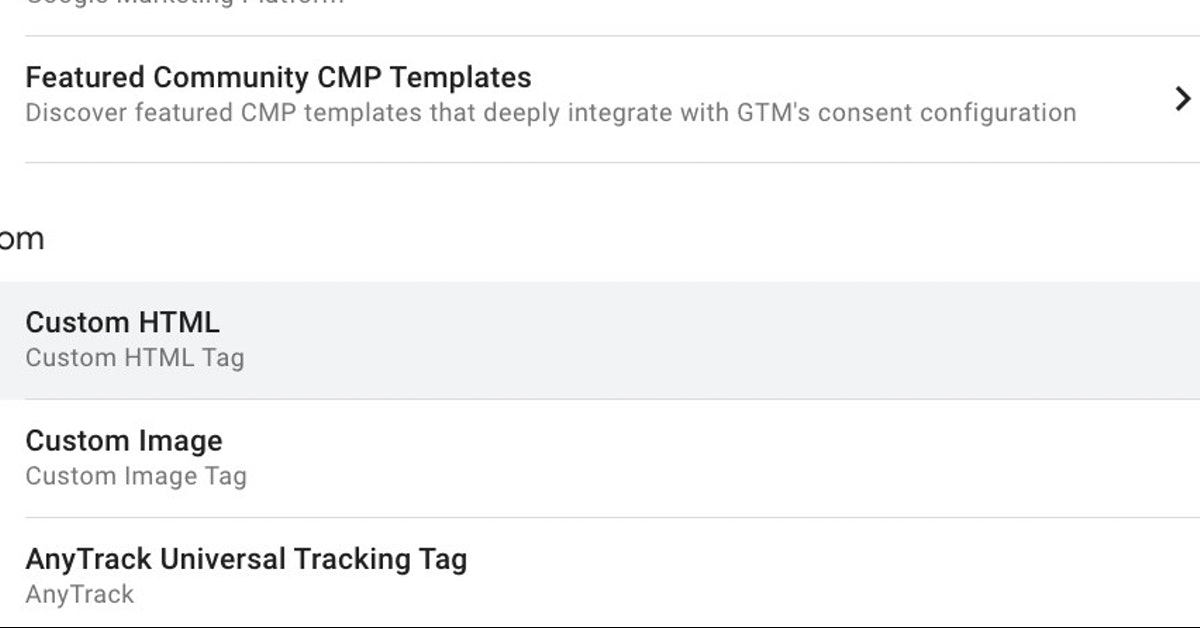
7. Paste the AnyTrack Tag

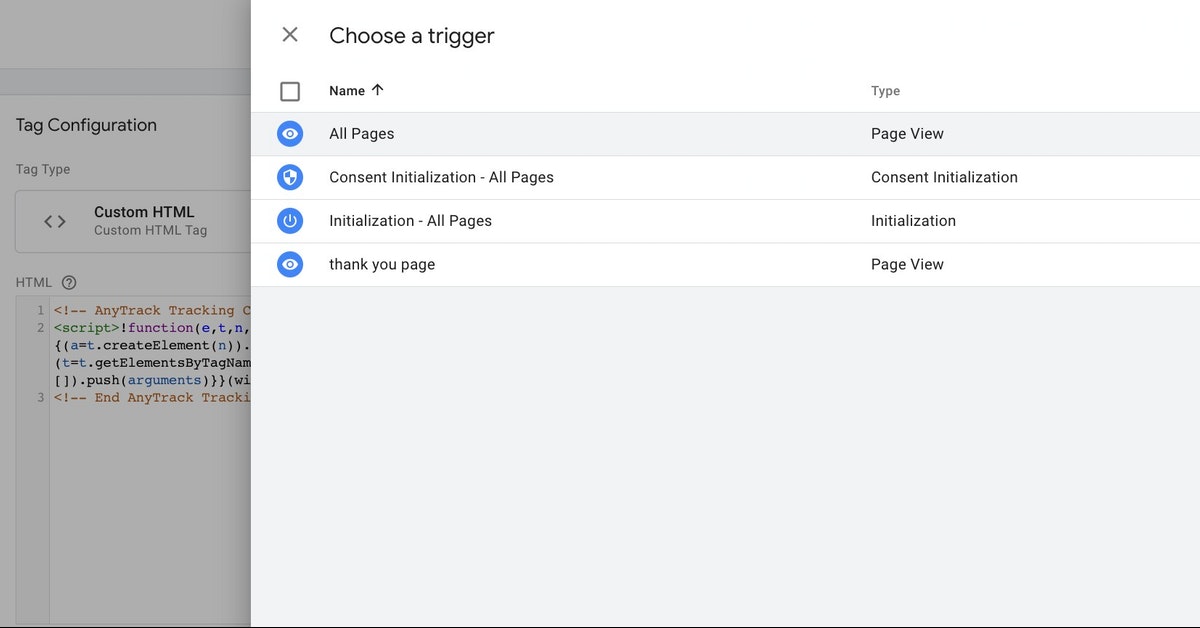
8. Click on Triggering Options
9. Select All Pages…
With AnyTrack AutoTrack & AutoTag features tracking outbound clicks, lead generation funnels are done for you automatically. So you don't need to trigger any other types of events or parameters.
10. Save the Tag and Name it
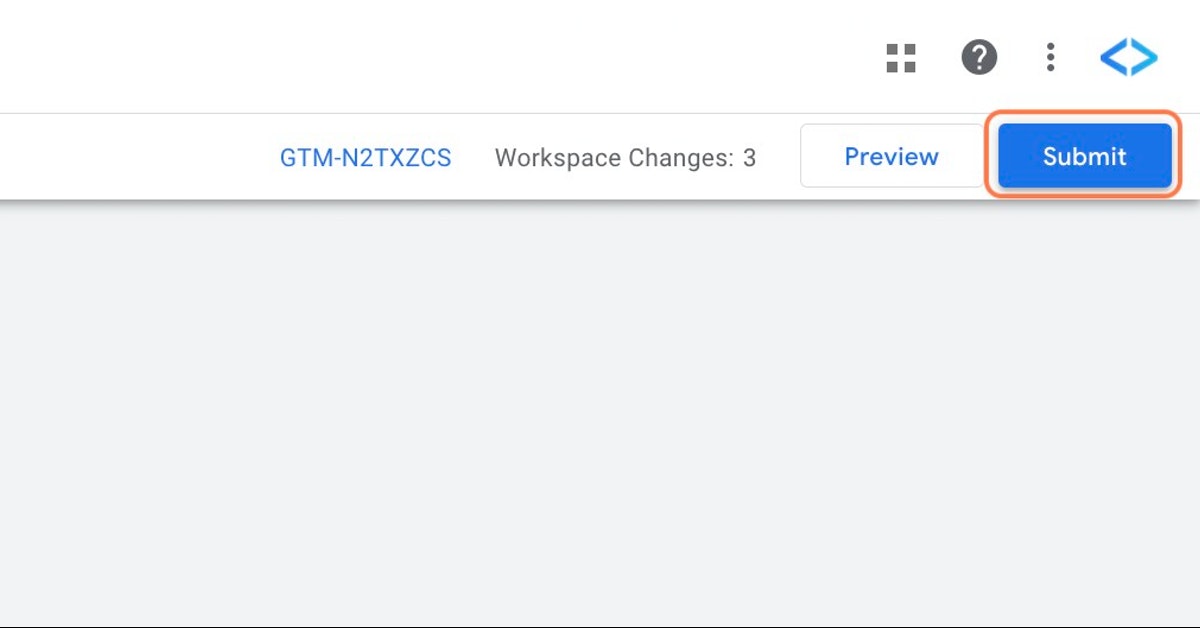
11. Submit your new GTM Container
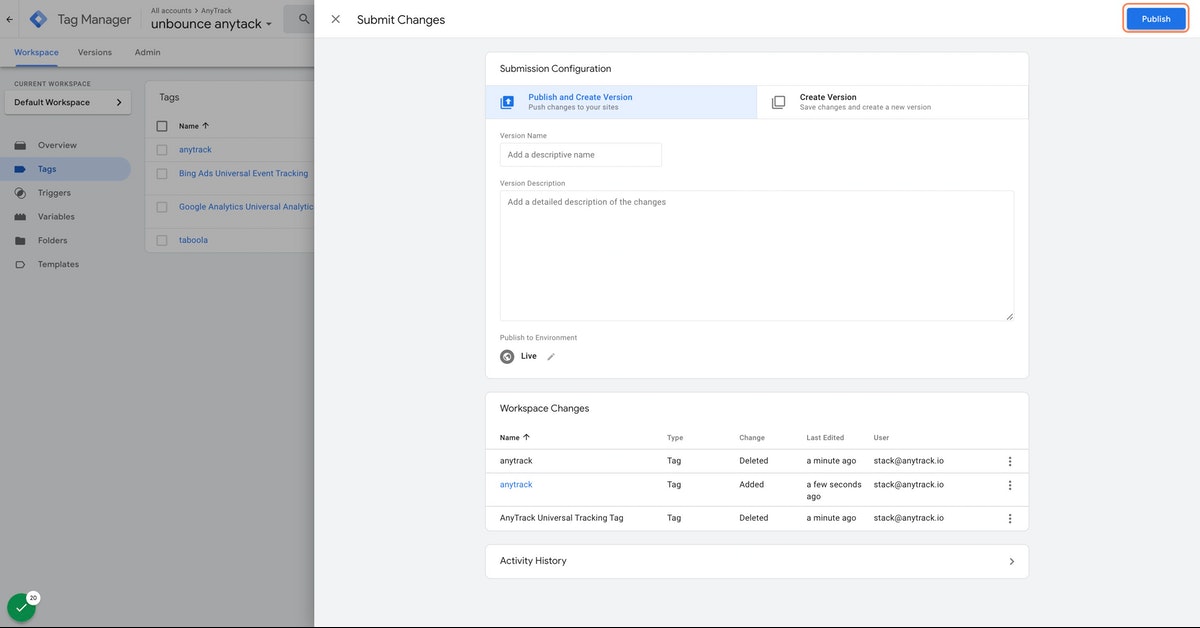
12. Publish the Container
13. Return to the property settings
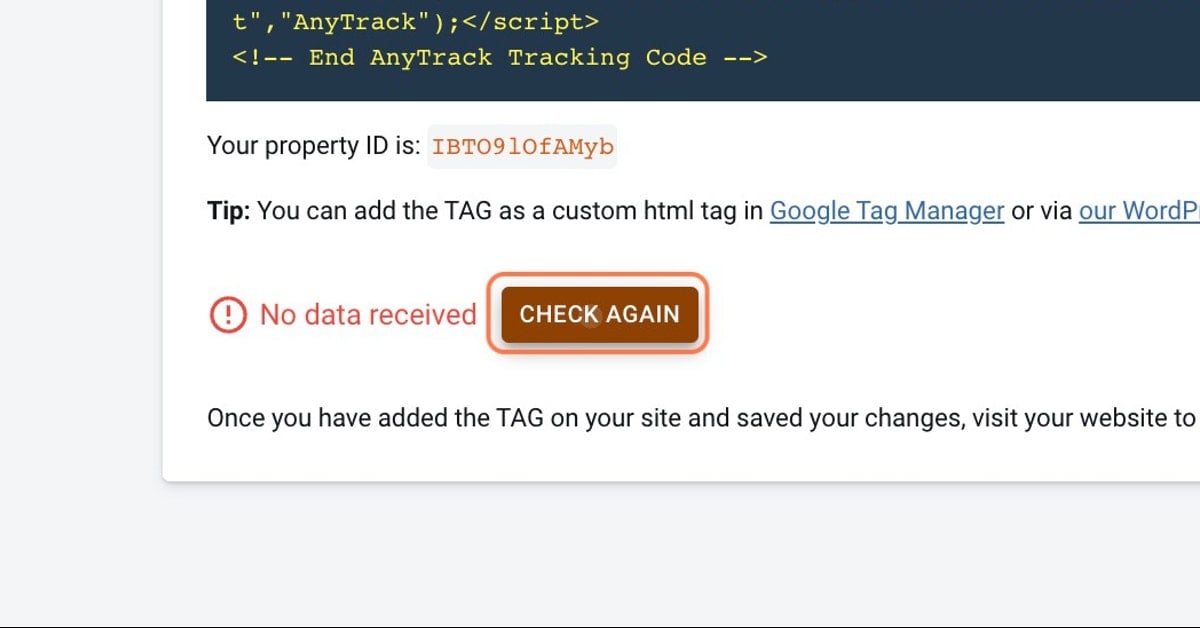
14. Refresh your website, and check the tracking status
Validation happens instantly but you might want to open your website through an incognito window which will load your site from a clean and uncached environment.
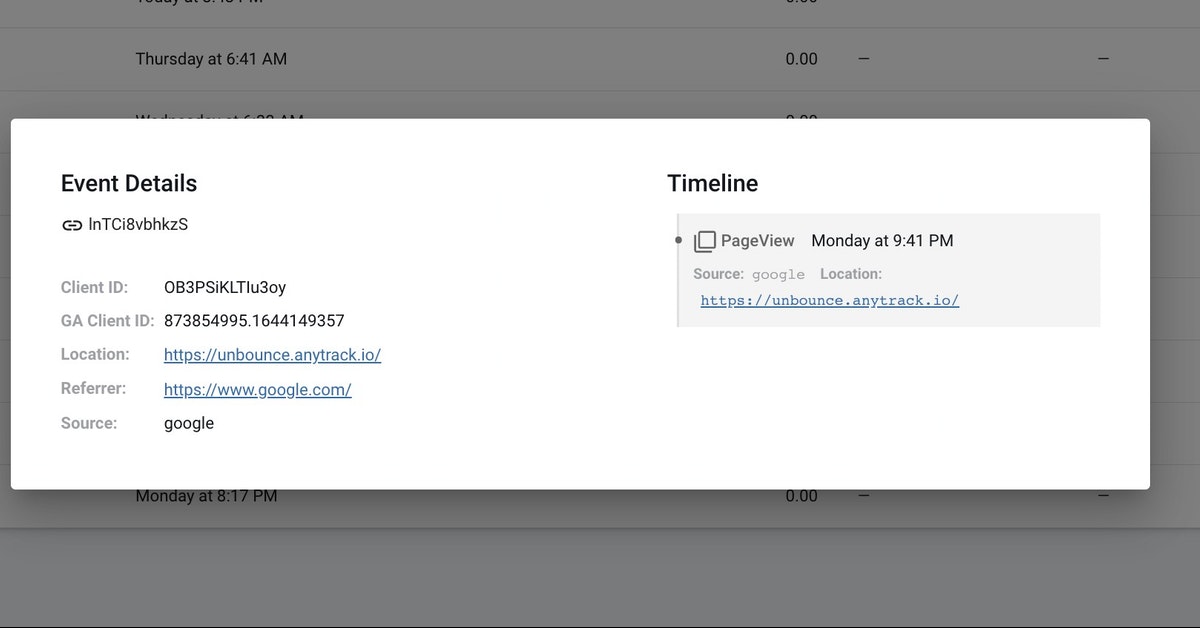
15. Navigate to the Conversion Event Tab
You will see the current events that have been recorded.
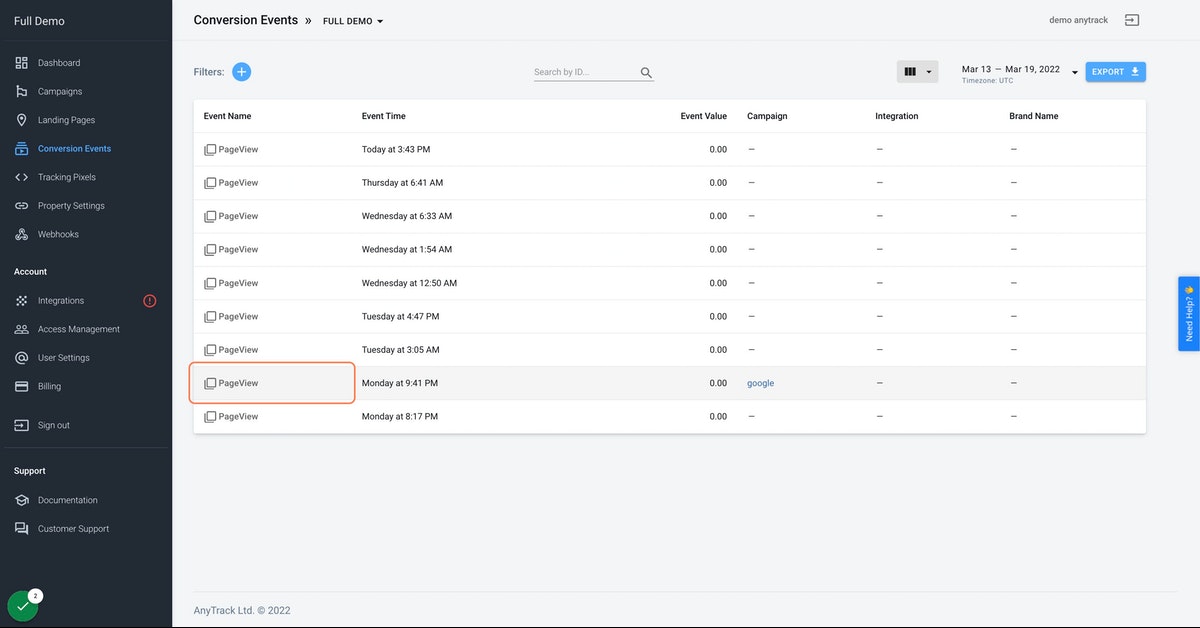
16. Click on one of the Events to see the payload
The payload shows the data captured by the AnyTrack Tag and the AnyTrack Tracking API.