In the next guide, you will learn how to connect your Elementor powered WordPress website with AnyTrack.
In the next guide, you will learn how to connect your Elementor powered wordpress website with AnyTrack and track form submissions, leads, and multi-step forms using the AnyTrack custom Webhook Integration.
About Elementor:
Elementor is the leading website building platform for WordPress, enabling web creators to build professional, pixel-perfect websites with an intuitive interface.
Elementor's form widget is extremely powerful as it allows marketers to set custom webhooks and integrations and add over 20 different types of fields - including hidden fields.
To start tracking your leads from Elementor, you will need the following:
- Elementor Pro (The Webhook feature is only available in Elementor Pro).
- The AnyTrack Tag is set in the head section of your website.
Setup tutorial:
✅ If you haven't set up yet the AnyTrack Tag in Elementor, now is the time to do it, and it takes less than 30 seconds.
If AnyTrack is already on your site, you can skip this part.
- From the Elementor Menu, open the Custom Code settings.
- Click on Add New
- Paste the AnyTrack Tracking Tag in the code section
- Make sure the Head option is selected
- Hit Publish
- Select Entire Site
Step 1: Create a custom integration
Navigate to the integration section and search for custom:

Step 2: Fill in the name of the integration (The URL is not obligatory) :

💡 Good to know:
When creating a custom integration, you must set some dummy values to the required parameters. Once created, you can remove the query parameters from the webhook URL.

Step 3: Save the integration to get your webhook URL.

Step 4: Now, we go to the Elementor form and add a new item under the form fields

- Type: Hidden
- Label: click_id

Step 6: Open the ADVANCED tab
Set the default value: --CLICK-ID--

Step 7: Open the Action After Submit menu
- Select Webhook from the drop-down menu
- Paste the AnyTrack Webhook URL

Step 8: Now it's time to paste the AnyTrack Webhook URL

👉 Reminder:
- All parameters are case-sensitive, so please follow the instructions meticulously.
- Do not toggle the advanced data option as it changes the structure of the json payload.
👉 Please refer to the default AnyTrack parameters here.
First-party data collection
If you want to collect first-party data (ex: email, name, phone) from your customers so that AnyTrack can send it to your Facebook Conversion API or Google Ads Enhanced Conversions, you should update the form labels according to the standard parameters here.

Now let's test the form to verify that the data passes as expected.
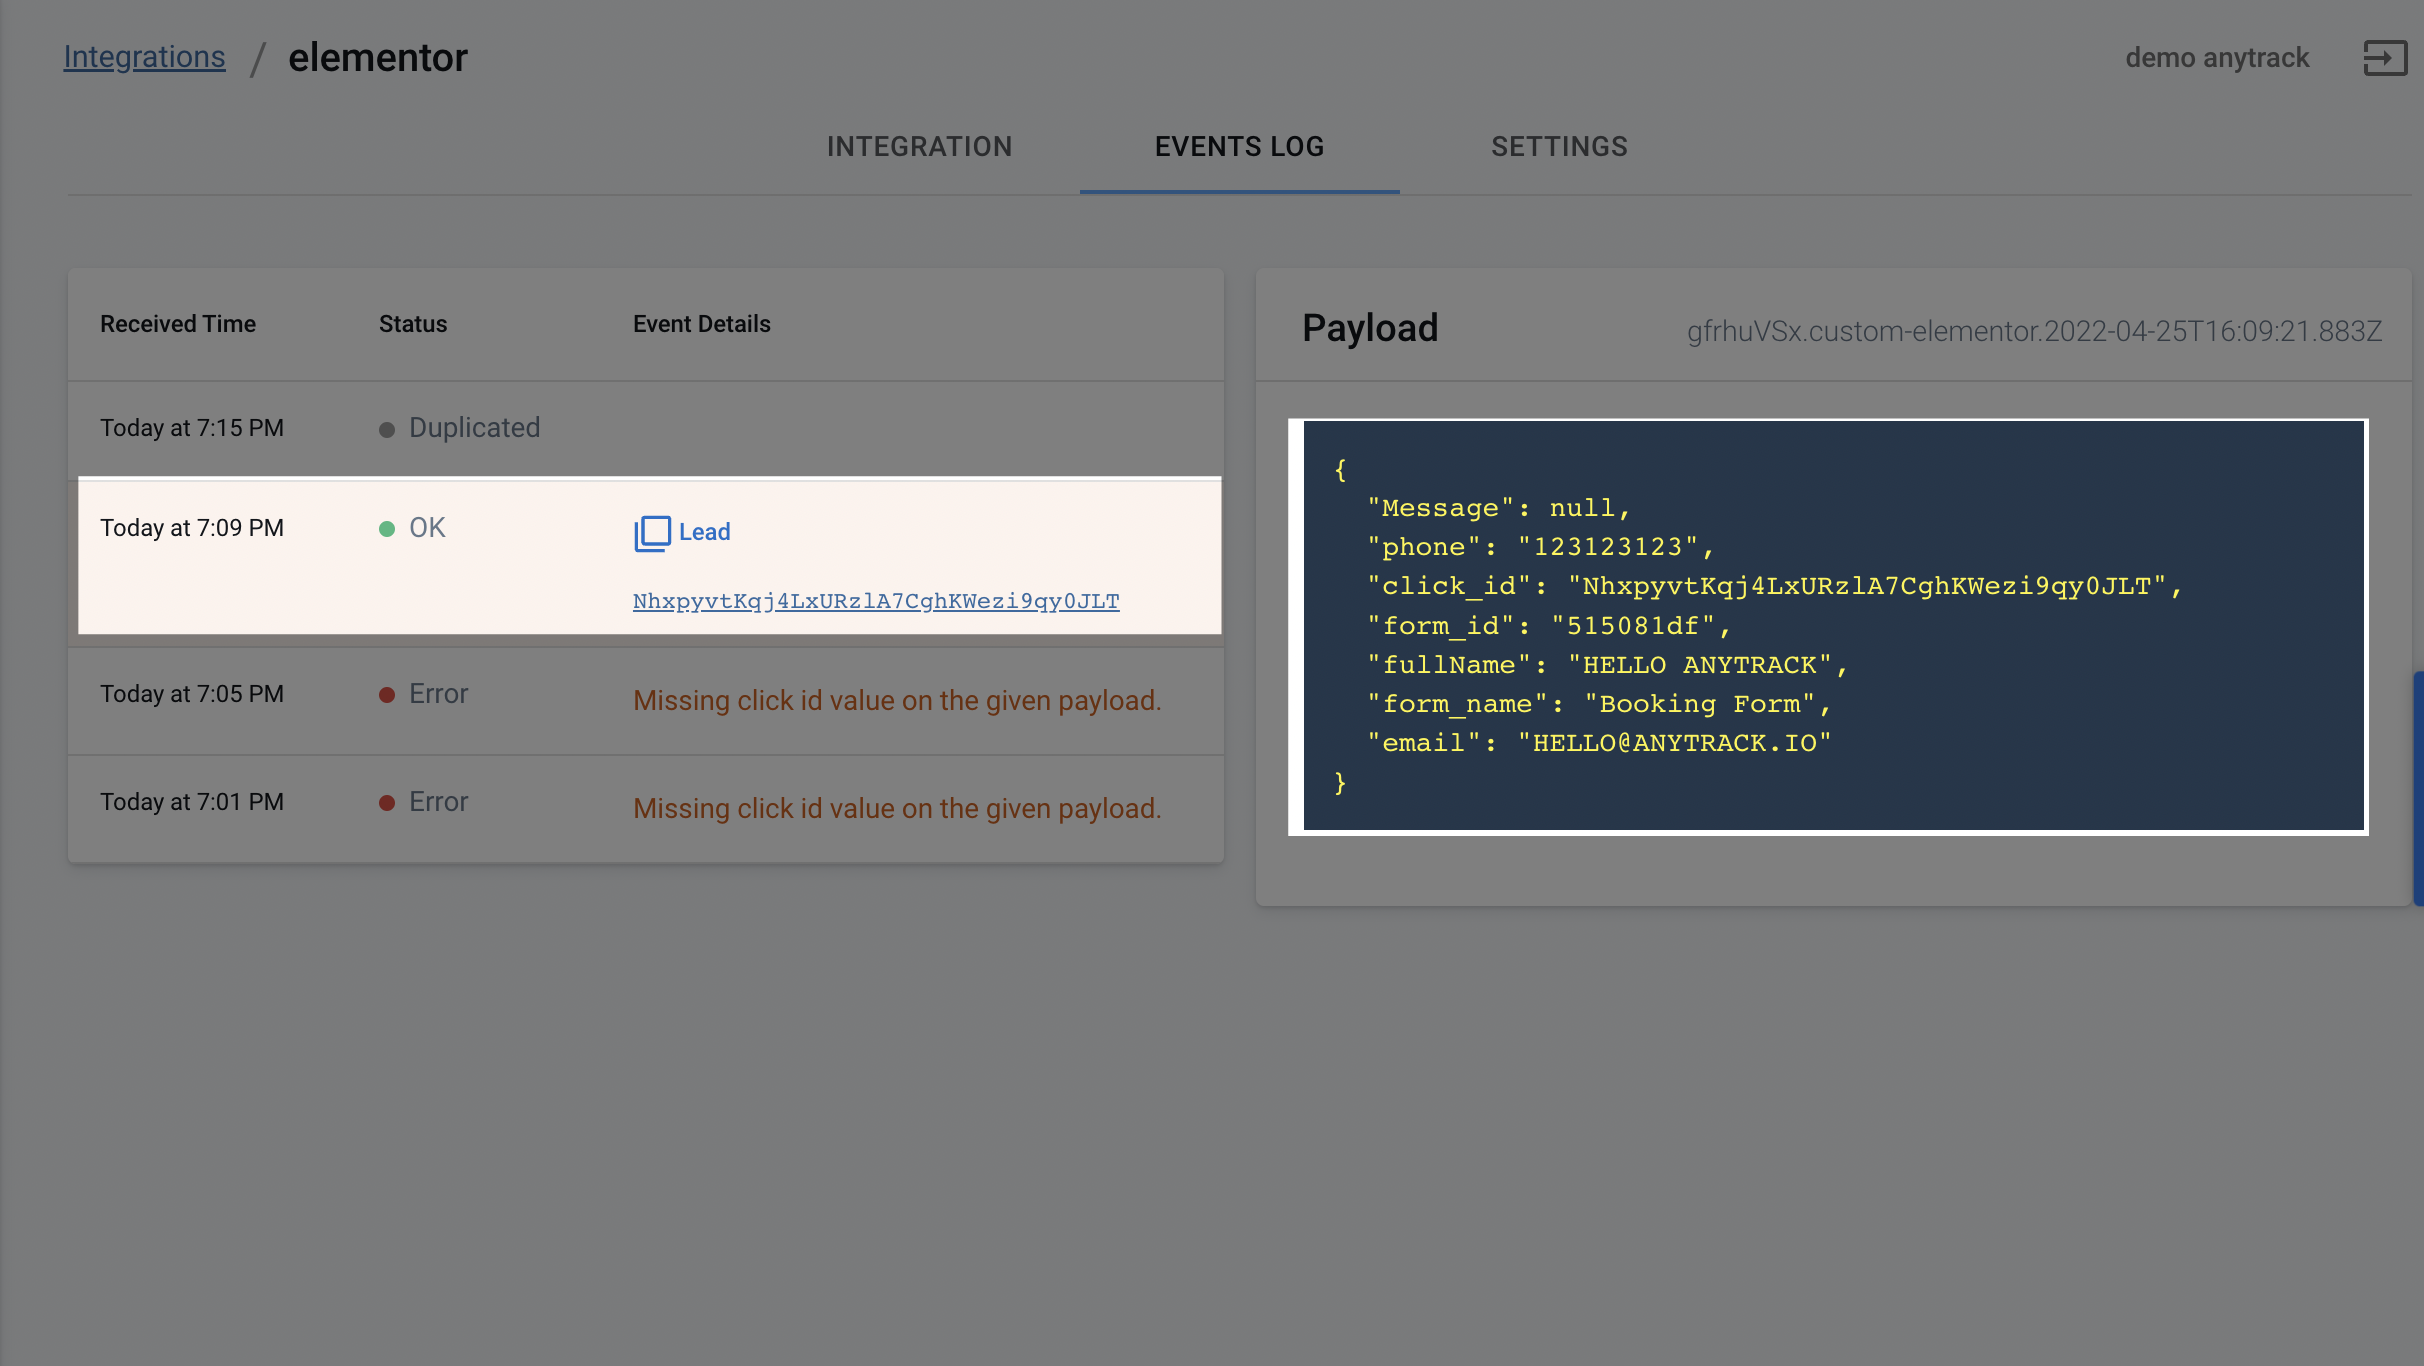
That's it! Now you can relax and let the data flow!
Need support?
Questions? Problems? Need more info? Contact AnyTrack Support for assistance!